Alerts
Cost & Commitment Expiration Alerts
Umbrella's Cloud Cost Management platform offers powerful alerting capabilities to help you stay on top of your cloud expenses. With our alert rules, you can receive notifications via email or Slack based on your predefined settings. This guide will walk you through setting up and managing alerts.
two main types of alert rules: Service-Cost Alert Rules and Commitment Expiration Alerts:
- Cost Alert Rules: Cost Alert Rules monitor changes in your cloud costs at both the Linked Account/Project/Subscription level, service level and aggregated level.
- Commitment Expiration Alerts: Commitment Expiration Alerts are supported AWS/Azure/GCP commitment. These alerts notify you before your Savings Plans (AWS/Azure), Reservations (AWS/Azure), CUD (GCP) are about to expire, giving you enough time to take necessary actions to renew or adjust your commitments.
Creating Service Cost Alert Rules
- From the left menu, navigate to the Monitoring > Alerts page.
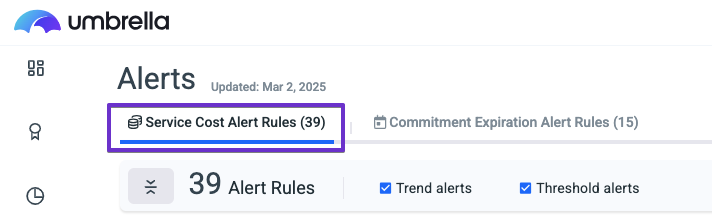
- Click on the Service Cost Alert Rules tab
- Click on Create Alert Rule from the right side of the page.
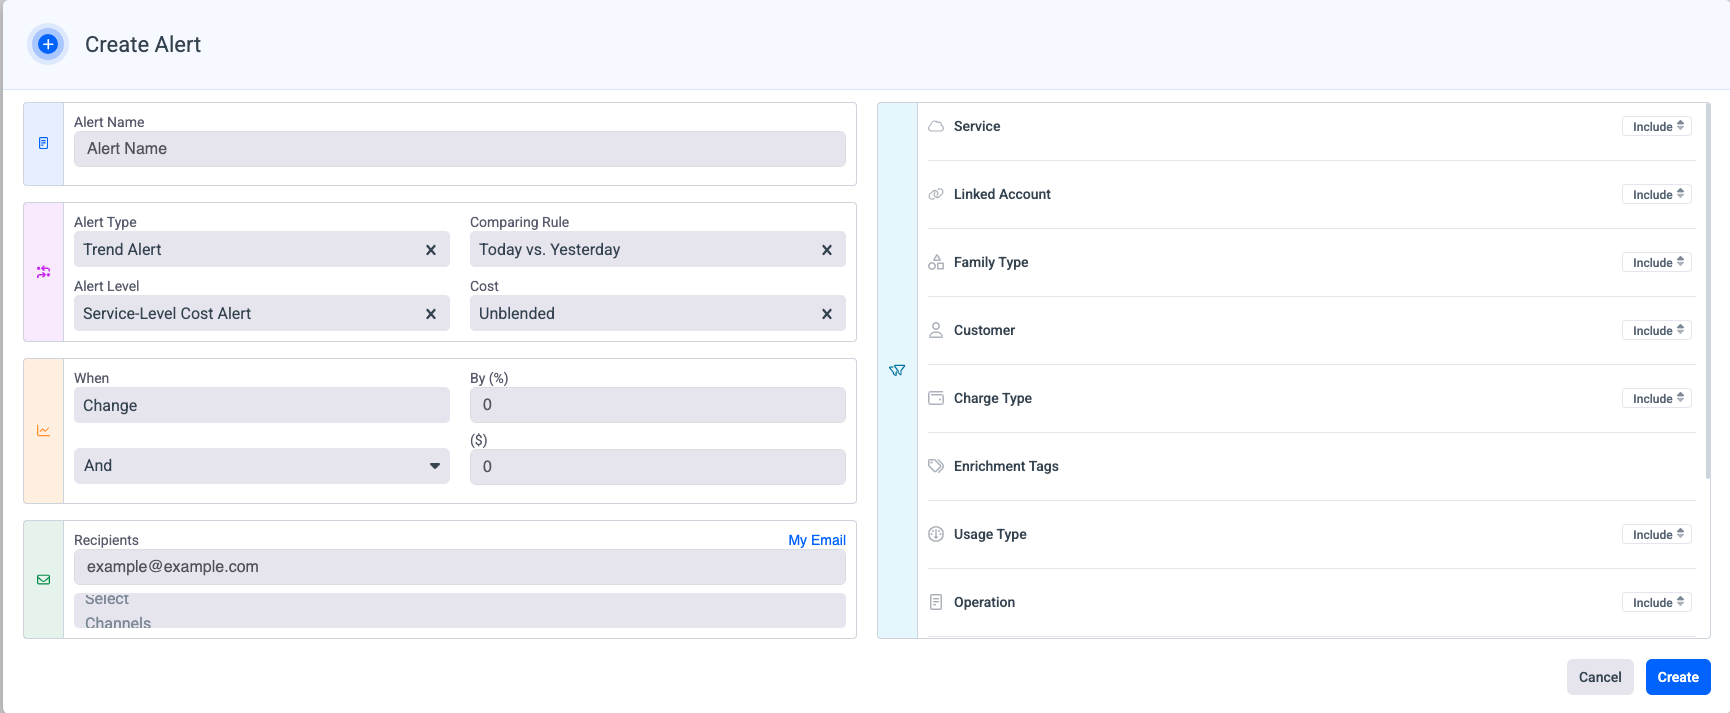
- Define the Alert setting with the following information:
-
Alert Type:
- Trend Alerts: Compare cost changes over time to track spending patterns and identify optimization opportunities.
- Threshold Alerts: Compare changes to a static cost amount to identify optimization opportunities.
-
Cost: Select the design cost Unblended/Amortize/Net Amortize.
-
Alert name
-
Alert level:
- Linked Account/Subscription/Project-Level Cost Alert: Receive alerts for changes in individual Linked account/Project/Subscription level costs.
- Service-Level Cost Alert: Receive alerts for changes in individual service and linked account/project/subscription costs.
- Total-Cost Alert: Receive alerts for changes in the aggregated costs of all services.
-
Comparison Rules: Define the comparison criteria:
- Today Vs. Yesterday
- Day this week Vs. Day last week: comparison between specific days. E.g. this Monday compared with last week's Monday.
- This WTD Vs. Last WTD: starting from Monday.
- This MTD Vs. Last MTD: from the beginning of the month.
Comparison rules are checked daily
The umbrella platform checks the data on a daily basis, therefore the comparison rules are activated on a daily basis.
- "Today vs. Yesterday" means the platform compares the most recent day of data to the day before it.
- "Day this week Vs. Day last week" means the platform compares Monday to Monday, Tuesday to Tuesday per your choice
- "This WTD Vs. Last WTD" - The platform compares the accumulative days of this week compared to last week (starting from Monday)
- "This MTD Vs. Last MTD" - The platform compares the accumulative days of this month compared to last month (starting from the first day of the month)
-
Criteria of Change: Specify whether the alert should trigger changes, increases, or decreases, and set the thresholds by percentage and/or cost.
-
Recipient: Choose where to send the alert notifications; email or other channels such as Slack, MS-Teams, Monday, Jira, ServiceNow or Webhook.
-
Filters: Customize the alert by including or excluding parameters such as service, tags, business mapping, charge type, etc.
-
- Click on Create.
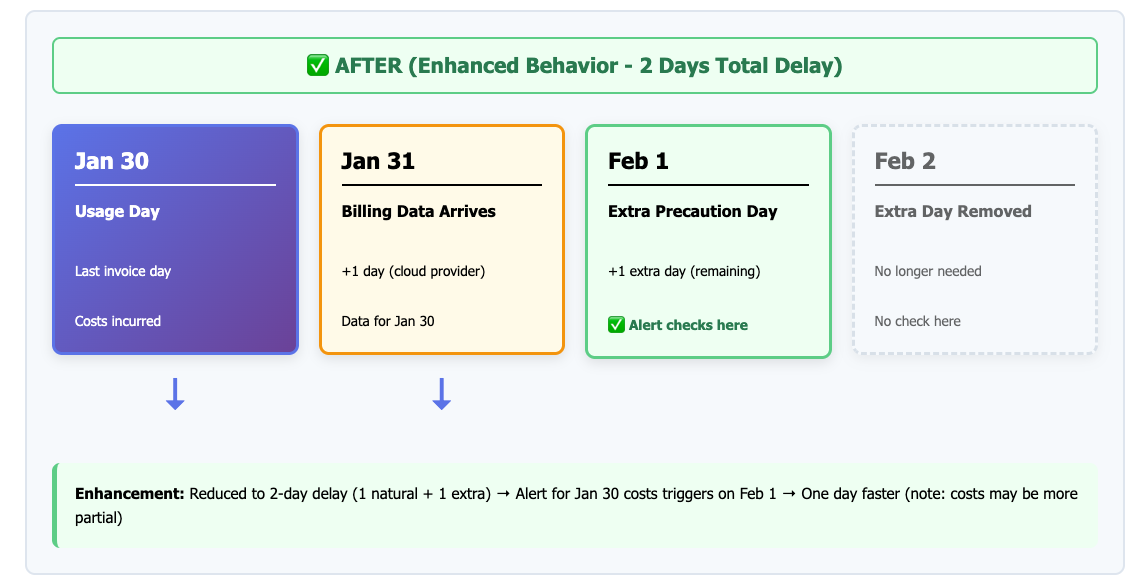
Cost Alert Timing
The alert system has natural 1-day billing delay (due to the cloud provider delay).
The logic has being changed on 31/12/25, more details can be found here.
Alert comparison timing example:
- January 30: Usage (costs incurred)
- January 31: Billing data for Jan 30 arrives
- Feb 1: Trigger alert here on January 30
Creating Commitment Expiration Alert Rules
- From the left menu, navigate to the Monitoring > Alerts page.
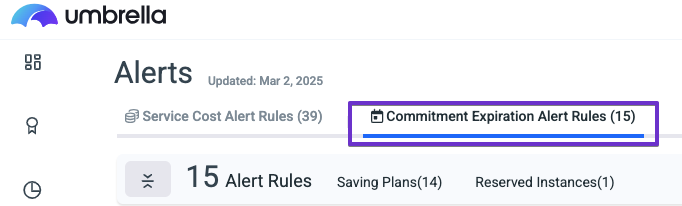
- Click on the Commitment Expiration Alert Rules tab
- Choose if to create an alert for Savings plans or reservations and click on Create Alert rule.
- Choose how many days before the commitment expires you want to be notified, and choose the relevant recipient - can be an email or a Slack channel.
- Click on Create.
⚠️ Heads-up for Azure accounts:
To enable commitment alerts, make sure Umbrella has the required permissions to access your commitment data. Follow the steps below:
Provide Permissions for your Reservations
Provide Permissions for all of your reservations
- Log in to your Azure portal.
- Navigate to the Cost Management page.
- From the left menu, under Optimization, click on Reservations + Hybrid Benefit.
- Click on a Role Assignment.
Note: In case your Azure account type is EA, make sure you change the scope to "Tenant Root Group". Otherwise, you will have to provide a role per reservation. See guidance below. - Click +Add > Add role assignment.
- Under the Role tab, search and choose the "Reservation Reader" role.
- Under the Members tab, click on Select members, and choose the application you connected to Umbrella (you can verify the application at Umbrella platform under the Accounts > App Registration page).
This will grant access to all Reserved Instances within the billing scope. Once the daily invoice is automatically processed, you’ll be able to view the reservation utilization in Umbrella.
Provide permissions per Reservation
- Log in to your Azure portal.
- Navigate to the Cost Management page.
- From the left menu, under Optimization, click on Reservations + Hybrid Benefit.
- ** Click on a specific Reservation** and from the left menu, click on Access Control (IAM).
- Click +Add > Add role assignment.
- Under the Role tab, search and choose the "Reservation Reader" role.
- Under the Members tab, click on Select members, and choose the application you connected to Umbrella (you can verify the application at the Umbrella platform under the Accounts > App Registration page).
- Repeat steps 3-7 for each reservation.
Provide Permissions for your Saving Plans
**Provide Permissions for all of your Saving Plans**
- Log in to your Azure portal.
- Navigate to the Cost Management page.
- From the left menu, under Optimization, click on Savings Plans.
- Click on a Role Assignment.
Note: In case your Azure account type is EA, make sure you change the scope to "Tenant Root Group". Otherwise, you will have to provide a role per saving plan. See guidance below. - Click +Add > Add role assignment.
- Under the Role tab, search and choose the "Savings plan Reader" role.
- Under the Members tab, click on Select members, and choose the application you connected to Umbrella (you can verify the application at Umbrella platform under the Accounts > App Registration page).
This will grant access to all Saving Plans within the billing scope. Once the daily invoice is automatically processed, you’ll be able to view the reservation utilization in Umbrella.
Provide permissions per Saving Plan
- Log in to your Azure portal.
- Navigate to the Cost Management page.
- From the left menu, under Optimization, click on Savings Plans.
- ** Click on a specific Saving Plan** and from the left menu, click on Saving Plan order ID.
- From the left menu, click on Access Control (IAM).
- Click +Add > Add role assignment.
- Under the Role tab, search and choose the Savings Plans Reader" role.
- Under the Members tab, click on Select members, and choose the application you connected to Umbrella (you can verify the application at the Umbrella platform under the Accounts > App Registration page).
- Repeat steps 3-7 for each reservation.
Need Help?
If you need further assistance or have any questions, please reach out to our support team at [email protected].
Updated 5 months ago