GCP onboarding
Follow our onboarding guide, which walks you through the initial steps to start with Umbrella on GCP.
As part of the onboarding process, you'll set up a billing data set within your GCP environment. Umbrella will automatically read this data every day to ensure seamless integration and accurate monitoring of your cloud costs and usage.
NoteBefore you begin, make sure you have permission to create a billing export and a Service Account in your GCP console.
Umbrella Cost does not support reseller-specific export. Whenever setting up the cost export, the preferred option is Detailed usage cost data.
- From the Accounts dropdown list, click Add Account and then click the GCP icon.
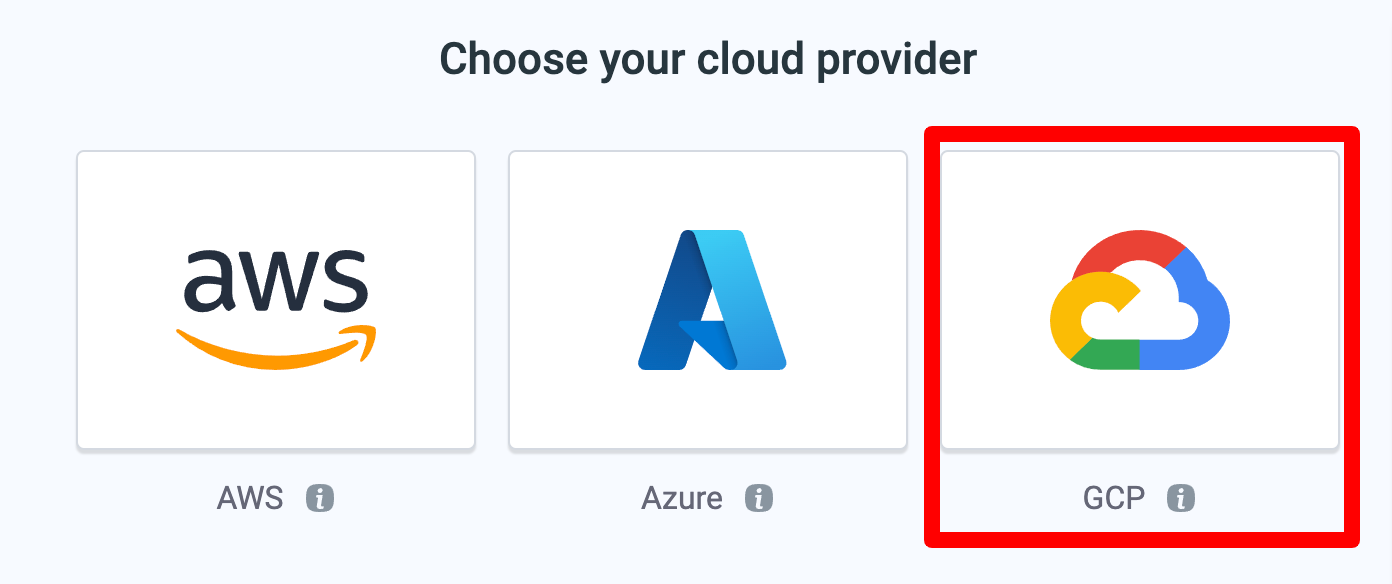
- Choose how you would like to complete the onboarding:
- Automatically (coming soon)
- Manually
GCP manual onboarding
The main steps of the onboarding process are as follows
- Create a billing dataset
- Enable APIs for Umbrella
- Create a service account on GCP
- Provide access to the BigQuery billing dataset
- Connect Projects for Recommendations
- Onboard your account in Umbrella
- Connect an additional project (optional)
- Add GKE labels (optional)
Create a billing dataset on BigQuery
GCP billing cost data is saved on a BigQuery dataset. To create this dataset and generate the billing report data, follow the steps described in the following GCP article: https://cloud.google.com/billing/docs/how-to/export-data-bigquery-setup
NoteFor the Cloud Billing export choose the Detailed usage cost data type.
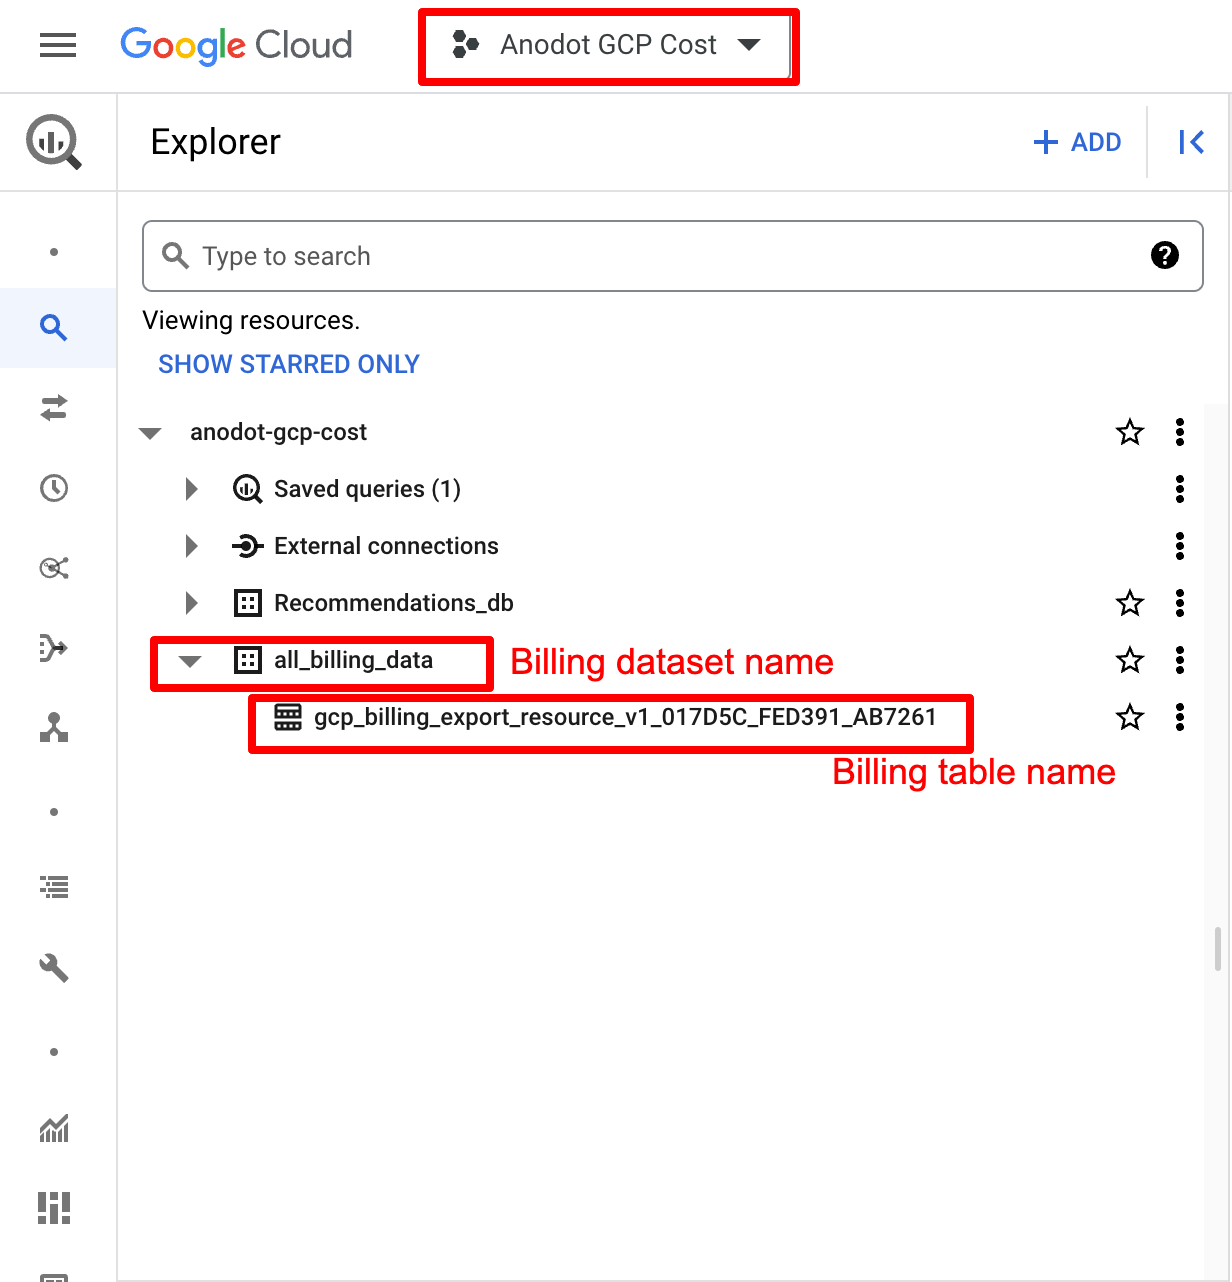
After completing this step, make a note of the following information when you enable the cost export:
- GCP project ID hosting the BigQuery data set
- Billing dataset name
- Billing table name
The following image shows how your BigQuery should look on the designated project (the names may be different).
Enable APIs for Umbrella
Enable the Recommender API and Cloud Resource Manager API on the chosen project.
Create a service account on GCP
- Choose the project that contains the billing dataset you created in the first step.
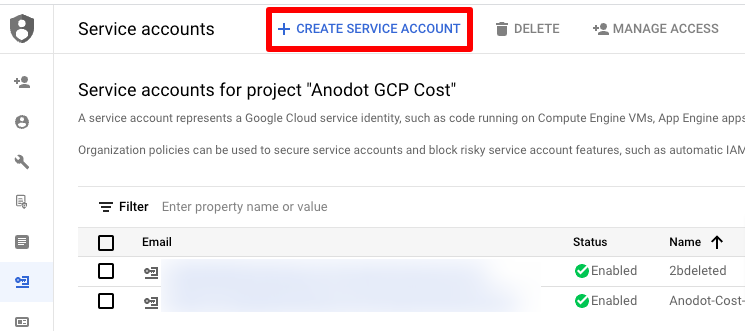
- Navigate to the IAM & Admin > Service Account page.
- Click CREATE SERVICE ACCOUNT.
- Provide a name for the service account and click Create and Continue.
- In the second step (Grant this service account access to the project), add the following roles, and then click Done:
- Monitoring Viewer
- Compute Viewer
- Compute Recommender Viewer
- BigQuery Job User

- Click on the service account you just created. Navigate to the KEYS tab, and click Create new key.
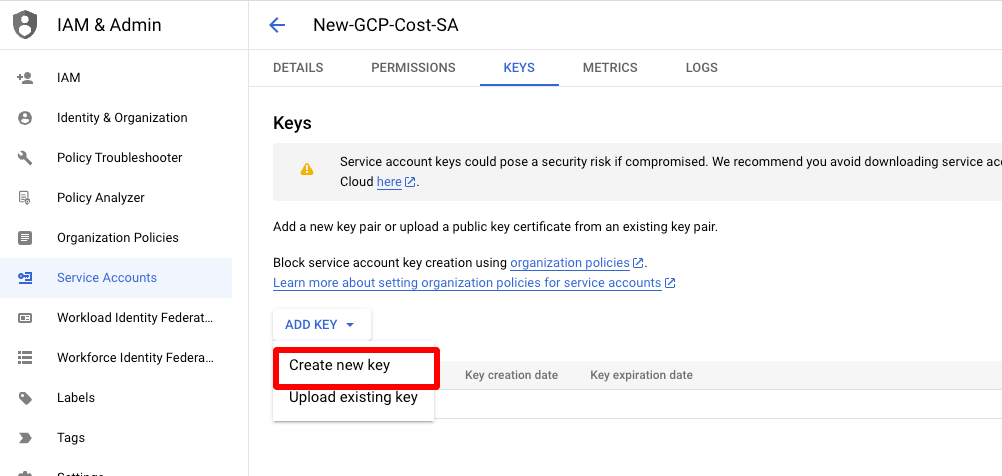
- Choose the JSON key type and click CREATE (this will download a JSON file to your computer).
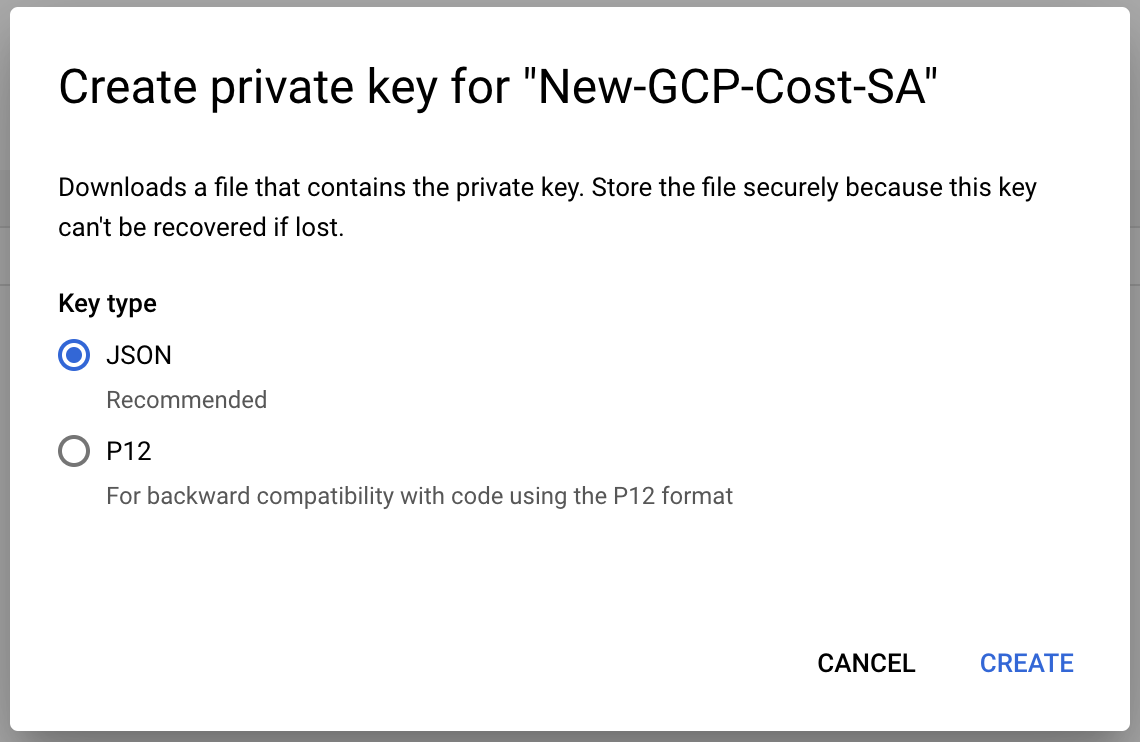
Make a note of the Service Account email and JSON file. These will be used later on during the account onboarding in the Umbrella UI.
Provide access to the BigQuery billing dataset
- Navigate to the BigQuery service and find the dataset you created with the billing export.
- Click the three dots next to it and choose Share - Manage Permissions.
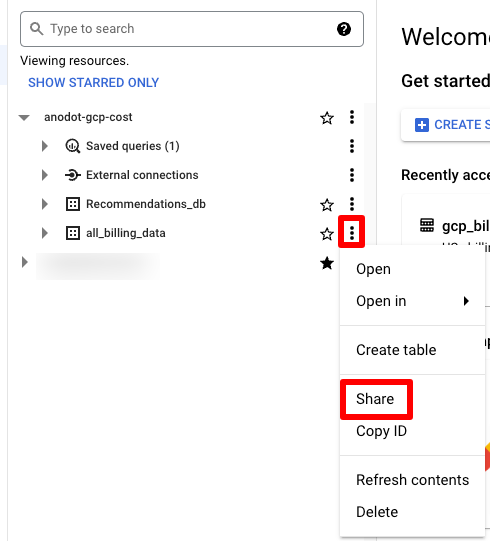
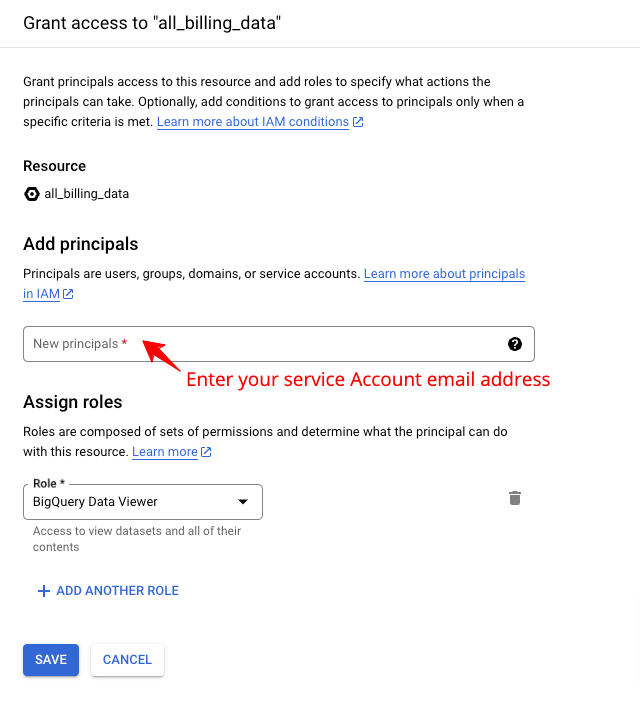
- Click the ADD PRINCIPAL option. Enter the Service Account email address, add the BigQuery Data Viewer role to it, and click Save.
Connecting projects ( Enables Recommendation)
Connecting projects enables Umbrella to analyze multiple projects in a single authorised service account and retrieve recommendations on resources located under those projects
This will require the service account to be provisioned on any additional projects we should be connected to.
The Service account can be added in several ways:
- On the organization level - will affect all projects underneath + covers all future additional projects (preferred).
- Manually on every project
- Using cloud shell commands.
On the organization level
- Go into the IAM section under the organization that contains project's that should be accessed by Anodot:

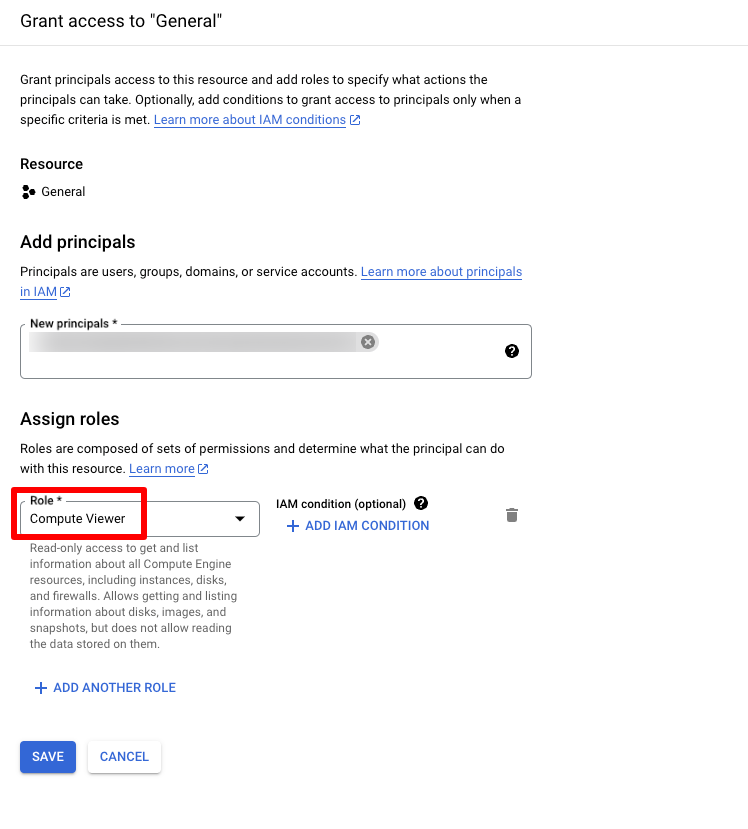
- From the left menu, click on IAM & Admin > IAM, and click GRANT ACCESS.
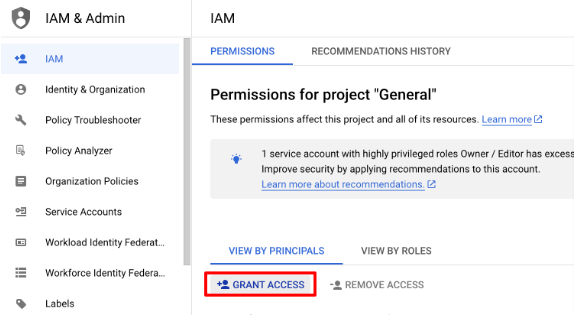
- Under the principal, add the service account email you created for Umbrella, choose Compute Viewer role permissions, and click Save. Repeat the same with Monitoring Viewer and Compute Recommender viewer .
Manually on every project
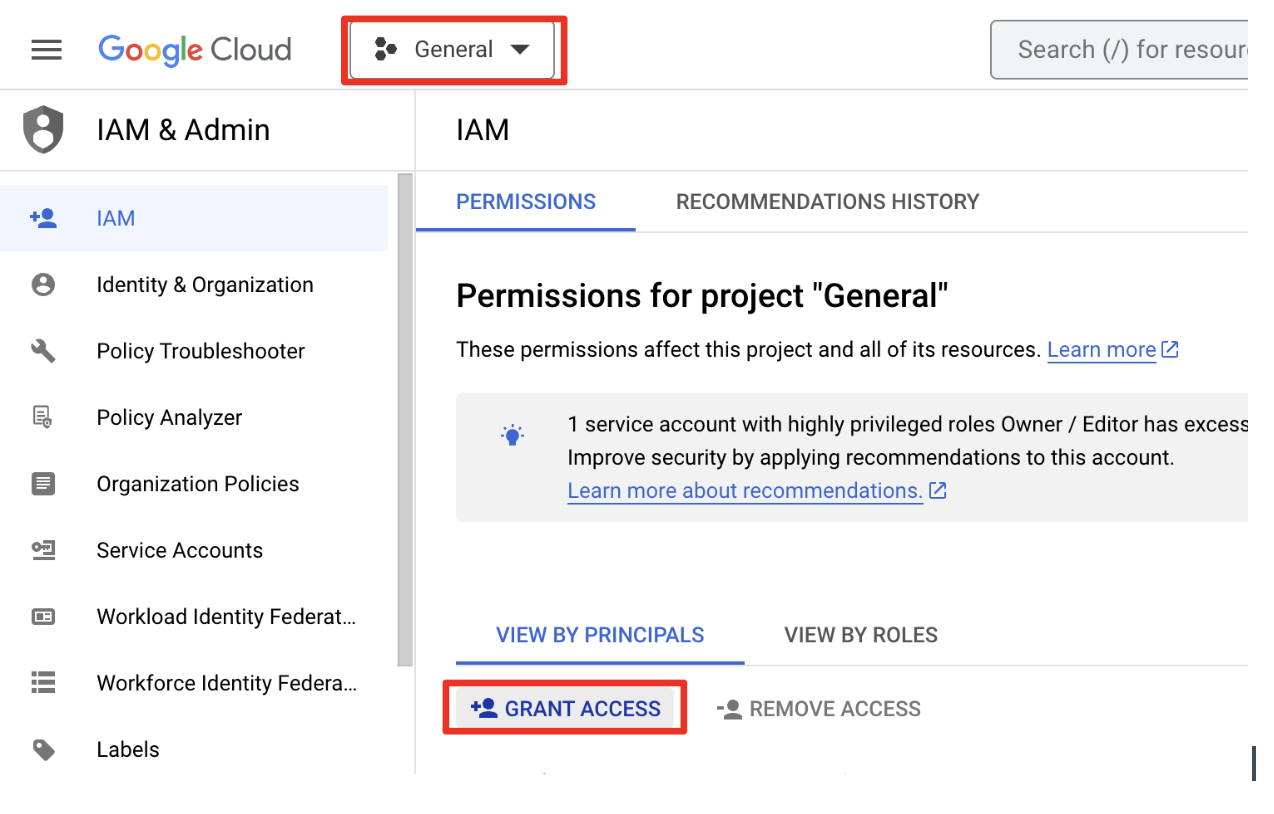
Repeat the same procedure as above, this time go into the IAM section under the project that should be accessed by Anodot for recommendations purposes, grant access to the service account with Monitoring Viewer, then Compute Viewer, and thenCompute Recommender Viewer roles one by one.
When the account is processed in Umbrella, all projects will be connected, and you will see recommendations for them.
You can see the project status under the Accounts > Projects page.
Onboard your account in Umbrella
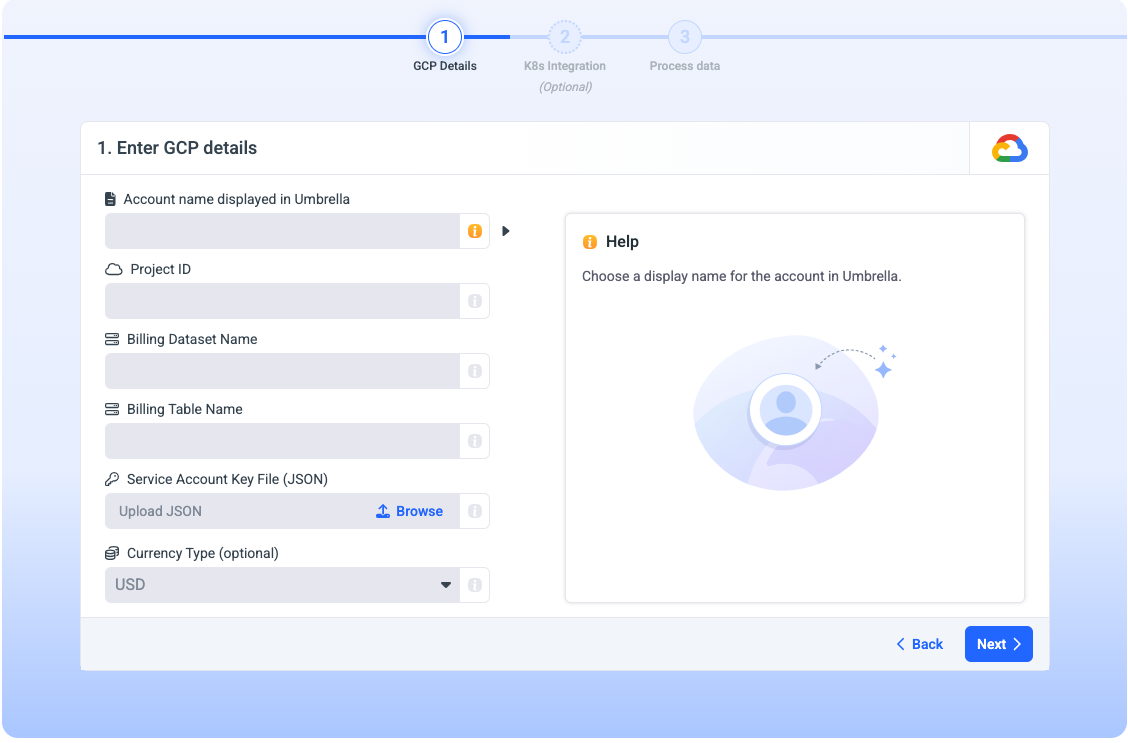
Enter the parameters you saved from the previous steps and click on Next.
Validation and invoice processing
Your GCP account details will be validated by Umbrella, and we will process your billing invoice. This step can take up to 24 hours. Note that you can close this tab, and we will send you an email once the validation is done and you can see data in the Umbrella platform.
Add K8s labels (optional)
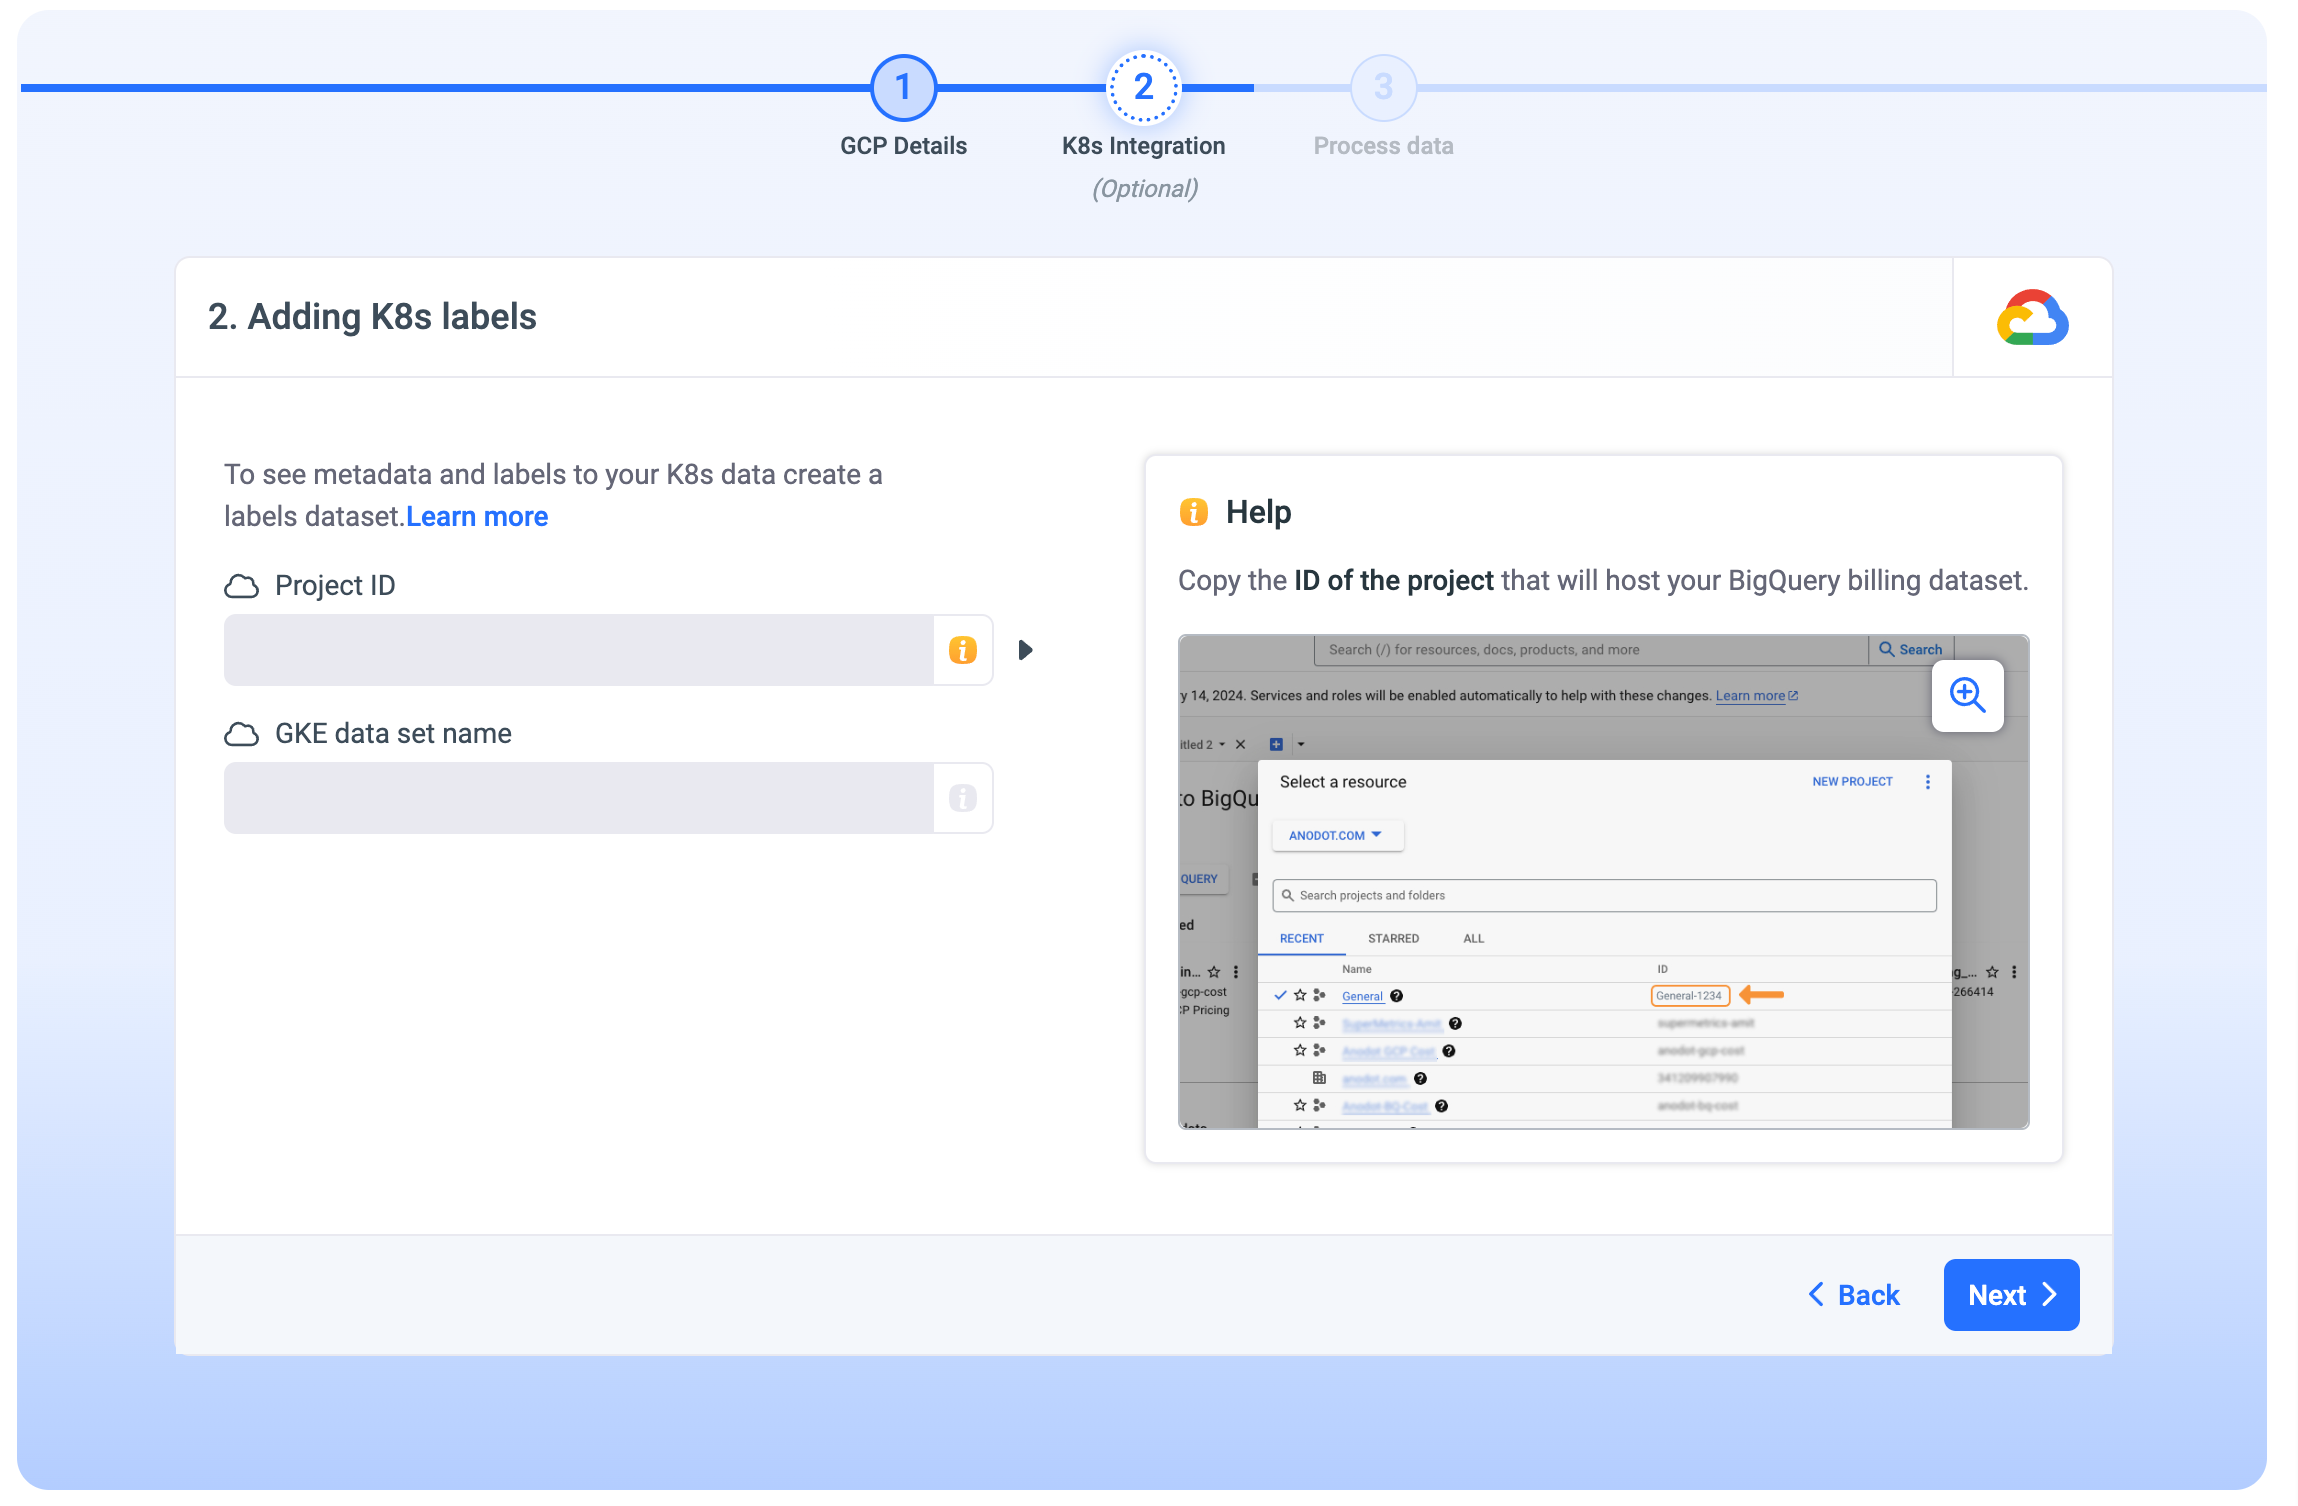
To see your Google Kubernetes Engine (GKE) data in Umbrella:
- The project where your clusters are located must be connected to Umbrella. You can find instructions on how to connect them here .
- Add your GKE labels. You can find the instructions here . Then, enter the project ID (where the GKE dataset is located), and the GKE dataset name, and click on Next. Note: Upon completing GCP instructions, send the following information to Umbrella support:
Congratulations! 🎊
With this step completed, you're now poised to access data on the Umbrella platform, granting you improved visibility into your cloud environment. Get ready to optimize costs and make informed decisions with ease!**
ImportantTime periods in the GCP Cloud Billing report use the Pacific Time Zone (PST) and observe daylight saving time shifts. However, Umbrella uses the UTC time zone. You may notice some cloud cost differences between Umbrella and the GCP Cloud Billing report due to the time zone difference.
Updated 12 days ago
