Cost & Usage Explorer Details
To control cloud costs better, you need a better understanding of what you are paying for and where each dollar is going. Umbrella Cost provides a unique Cost & Usage Explorer that gives you the ability to truly understand your billing.
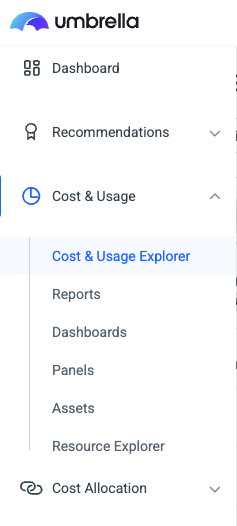
To access the Cost & Usage Explorer, in the left navigation bar, click Cost & Usage > Cost & Usage Explorer.
CUE Date Ranges
The maximal date range is determined by the granularity the information is requested in.
- Hourly - 31 days
- Daily - 150 days
- Weekly - 168 days (24 weeks)
- Monthly - 365 days
- Quarterly - 365 days
- Yearly - 1095 days (3 years)
Cost & Usage Explorer Features
The Cost & Usage Explorer provides various features that help you understand your billing, customize your display, and create advanced reports, including:
- Grouping X by Y
- Filters
- Deep Dive
- Legend
- Data Shape
- Table
- Cost Types
- Usage
- Rate
- Goals
- Share URLs
- Views
Grouping X by Y
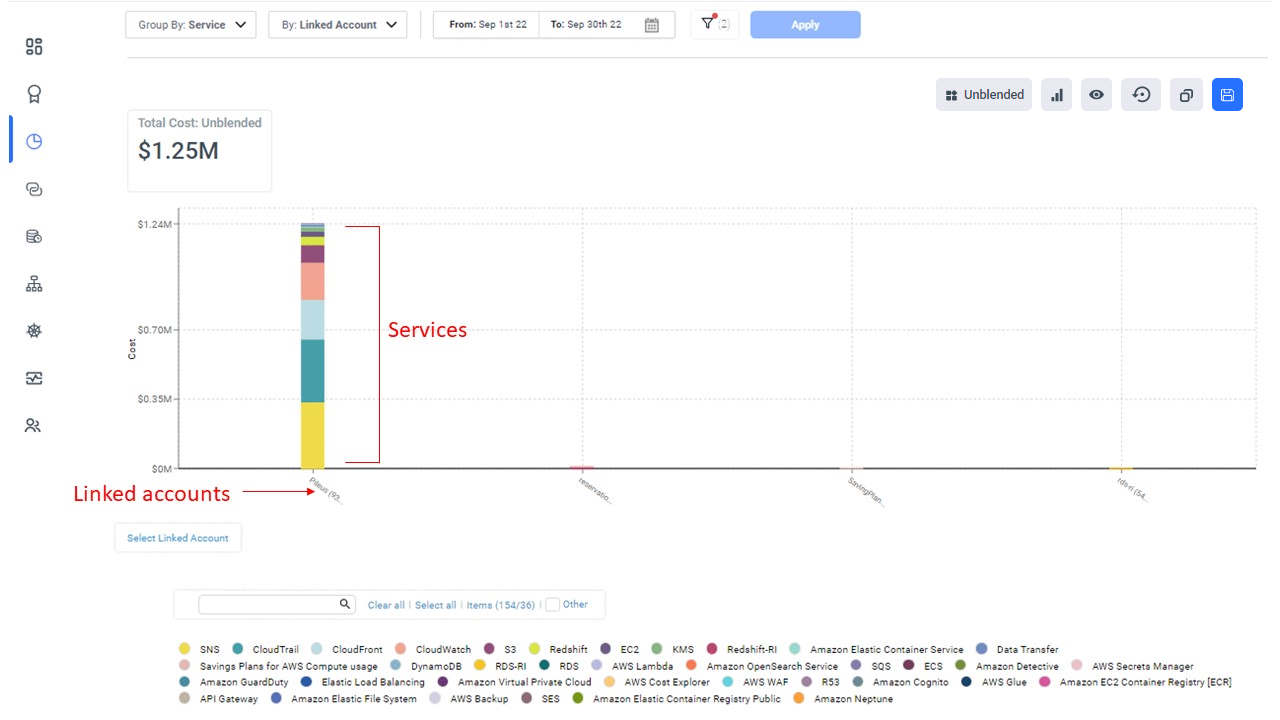
You can select how to group costs by selecting up to two groupings from the Group By and By lists: service, region, linked account, cost center and user tags.

The two-levels of groupings enable you to group all services by the linked accounts.
For example:
Filters
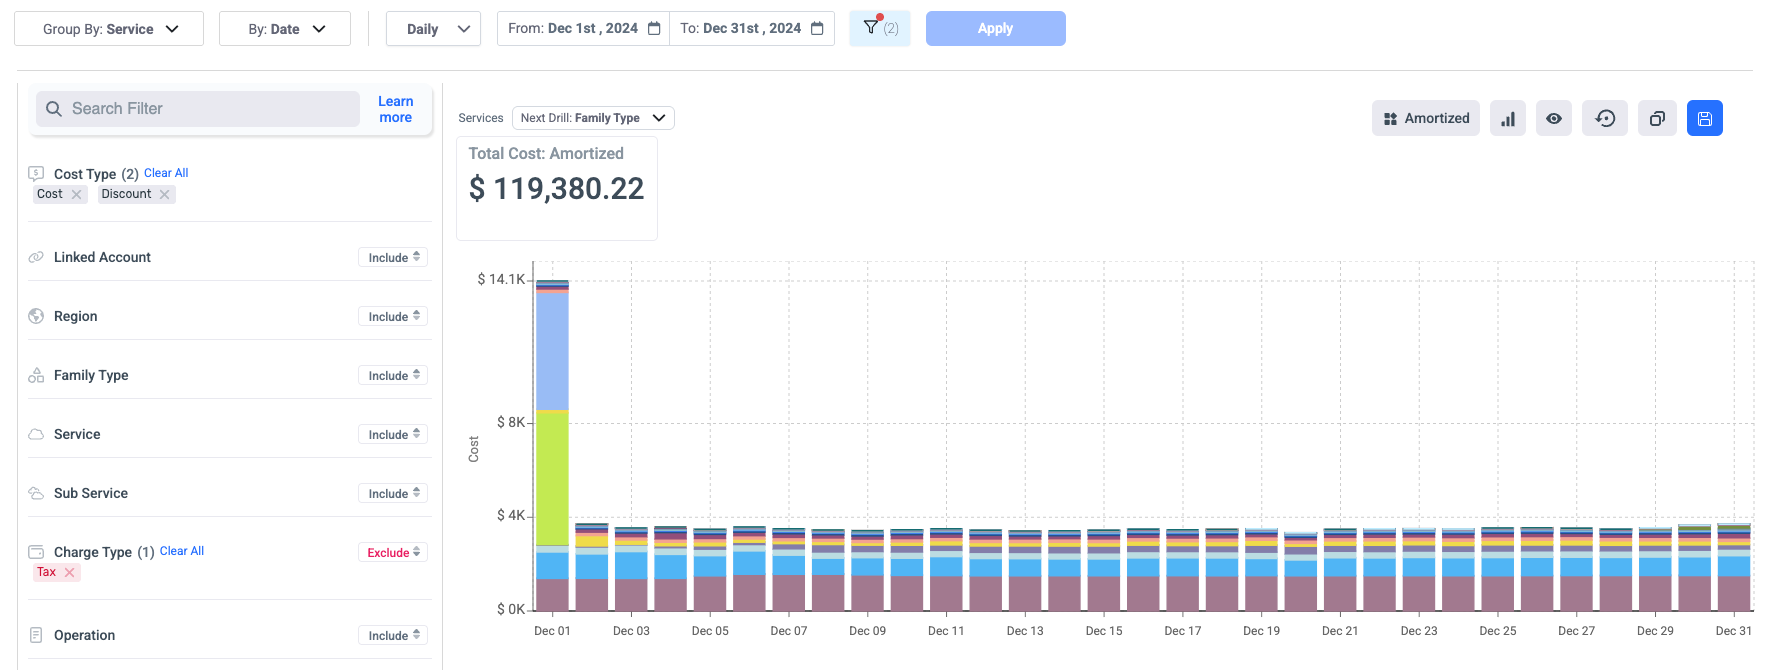
When you want to focus only on the cost of specific resources, you can filter the costs by Region, Linked Account, Service, Cost Center, Tags, and more. Each filter is multi-select, so you can select more than one value at a time. Click the filter icon to display/close the list of available filters on the left of the Explorer window, as shown below. After selecting the relevant filters, click Apply. You can also click the Include link for each filter to exclude specific values for that filter. To learn more about the filtering option click here .
Global list of values
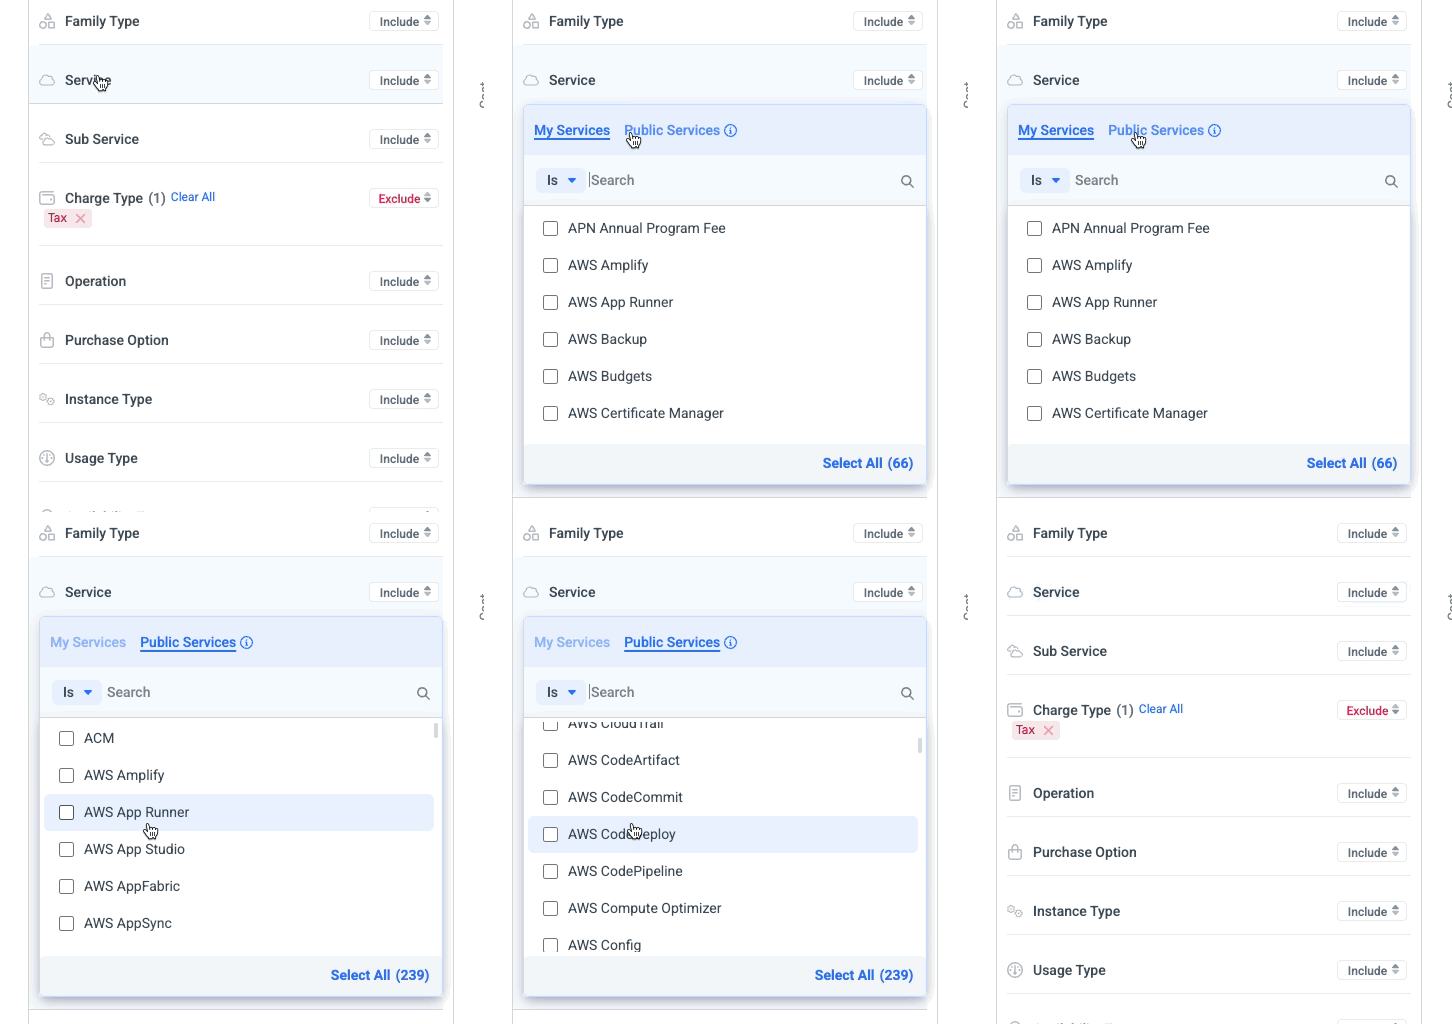
For the following AWS fields- Services, Region, Availability Zone, and Usage Type- you will see two tabs in the filter options:
- My Values: Shows only values that exist in your CAU Export (meaning, those with associated costs).
- Public Values: Displays all values available from the cloud provider. Some may not yet have costs in your account, but you can still use them when creating dashboards for services you plan to consume in the future.
Notes:
- The Public Values list is available across the platform wherever filters are used (e.g., Business Mapping, Reseller Billing Rules, Budgets, and more- except Waste Detector).
- The My Values list may also include Umbrella-specific custom services, so the two lists may not fully match. For example, if you select all values under My Values and then switch to the Public Values tab, you may see fewer values selected.
Deep Dive
Define your own drill-down path, choose which field to explore next for more flexible and tailored data analysis. To do so, choose the next drill field, and click on the relevant value you want to filter. For example, the drilling down is customWhen the second group level is Date, you can deep dive into any level you choose bythe chart by clicking on the relevant data on the chart. For example, when you want to understand the spike on November 7th for the CloudFront service, you can click on the CloudFront data on the chart, as indicated below.
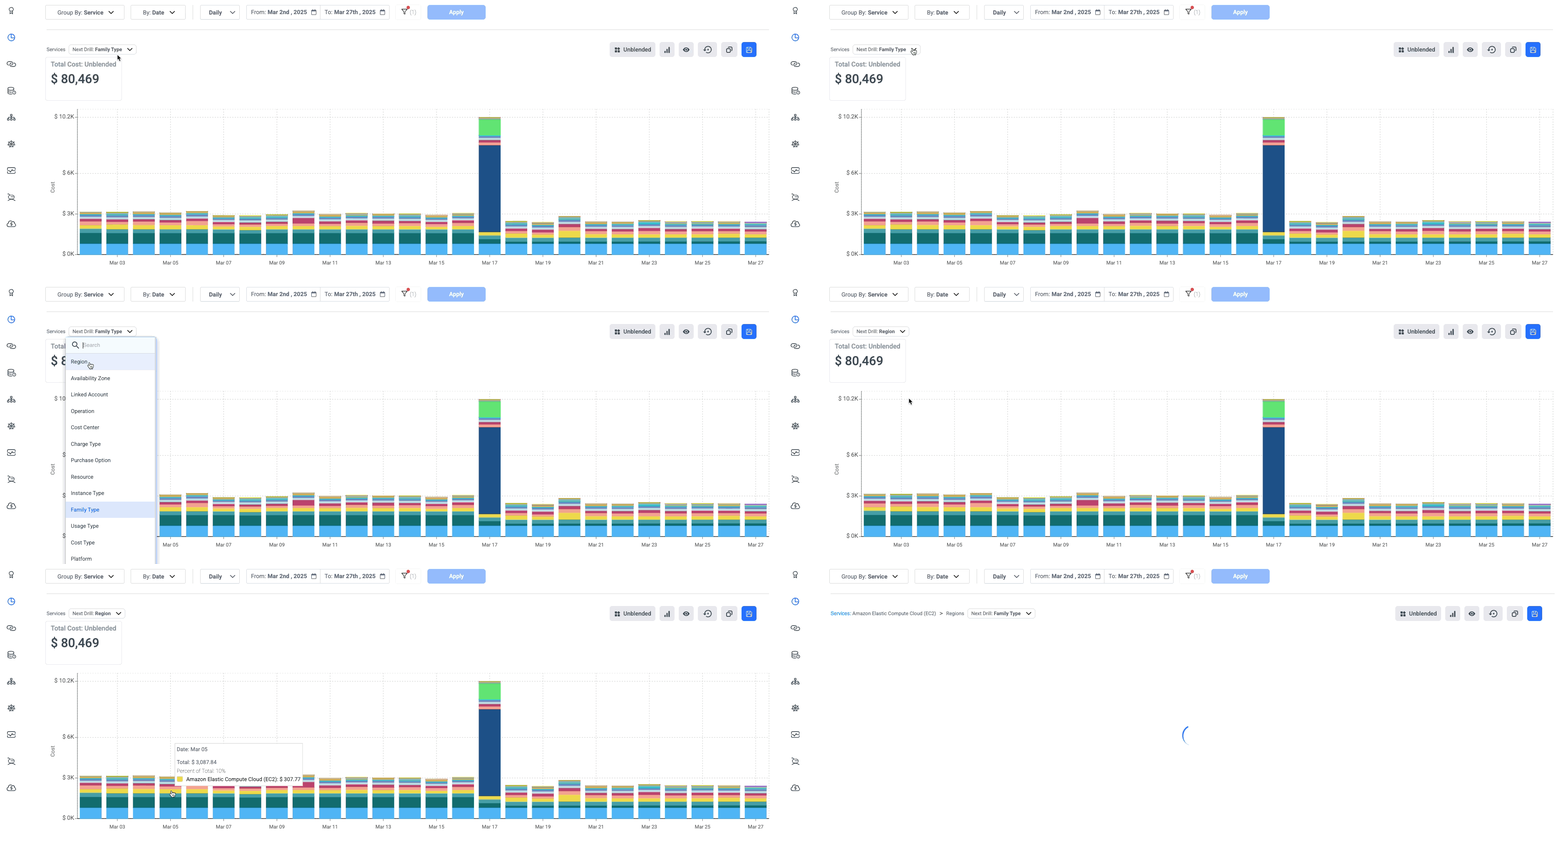
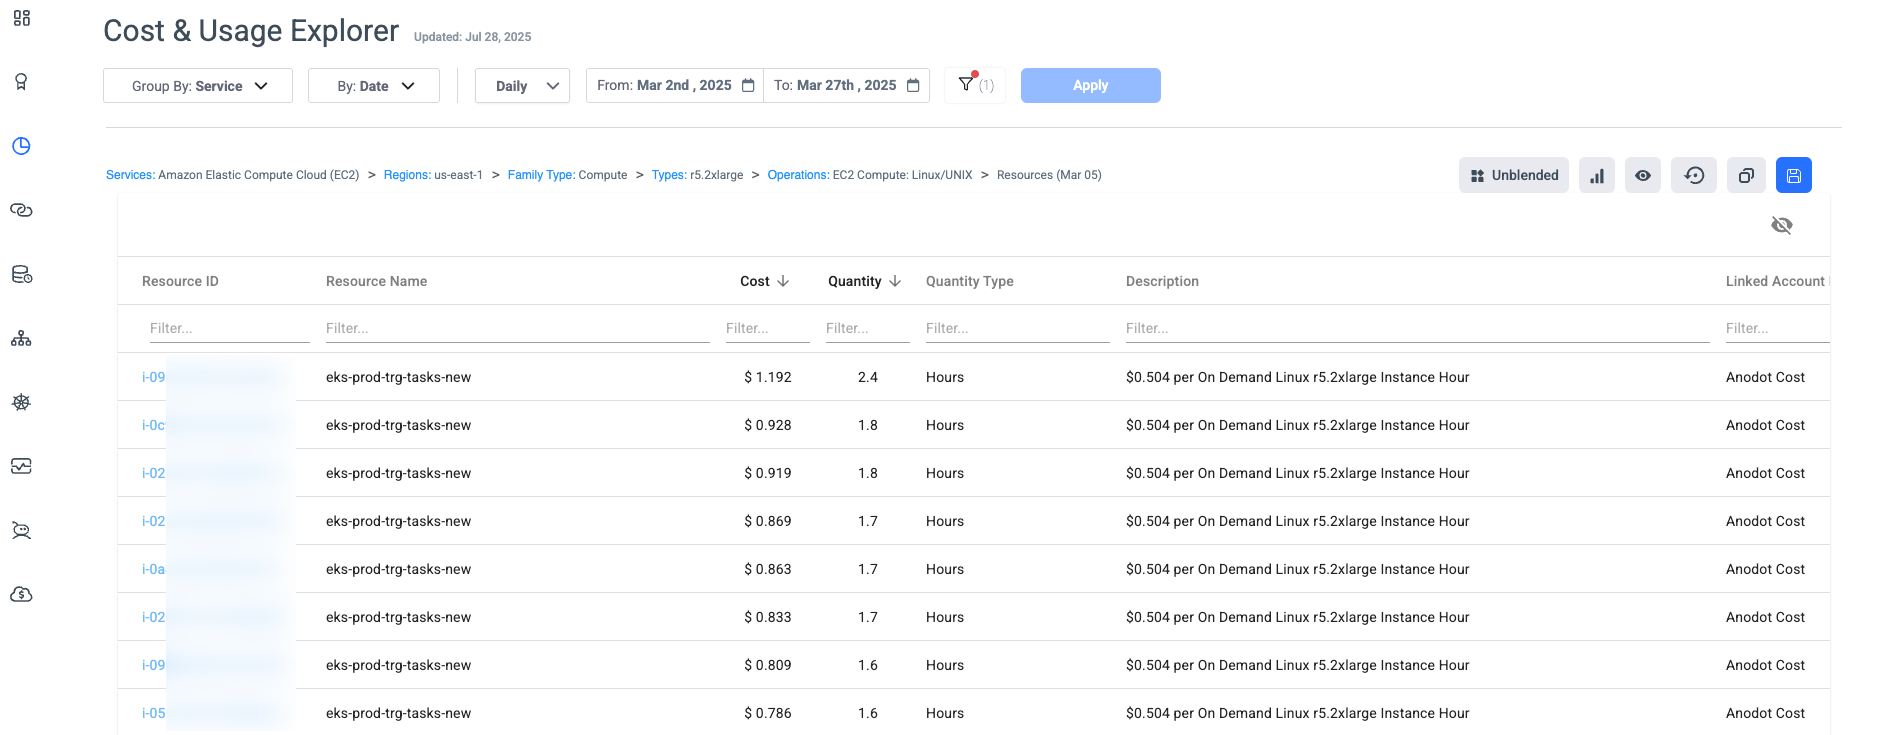
In the top left corner, you can see the path that indicates where you are located in your deep dive. You can continue to deep dive until you arrive at the resource level, as shown below. If you want to return to the previous step, simply click on the relevant field in the path bar.
Legend
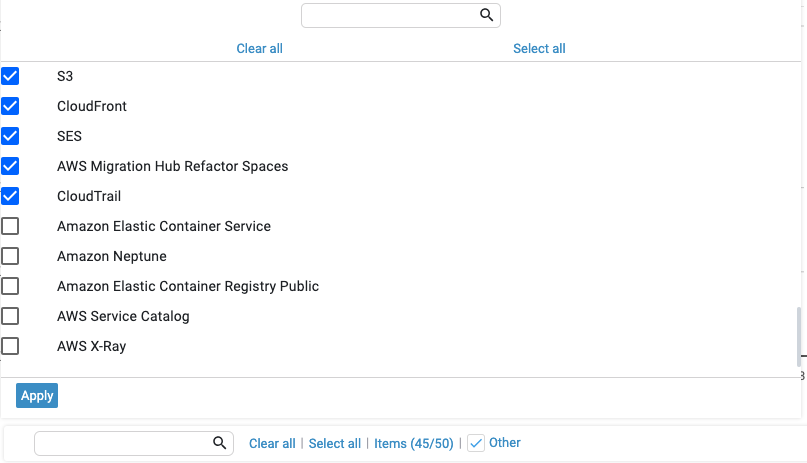
Use the legend at the bottom of the screen to drill down to specific services. You can click on an individual service to add/remove it from the displayed chart.

By default, up to 45 items are presented in the graph and legend, in case there are more than 45 you can select additional items using the 'Items' selection. The 'Select all' button is available only if there are fewer than 100 items. In case there are more it will be disabled.
Data Shape
Umbrella Cost enables you to quickly switch between different representations, by selecting the relevant option from the Graph Options list, as shown below. Note that the actual icon shown on the Graph Options button changes according to the option selected.

Table display
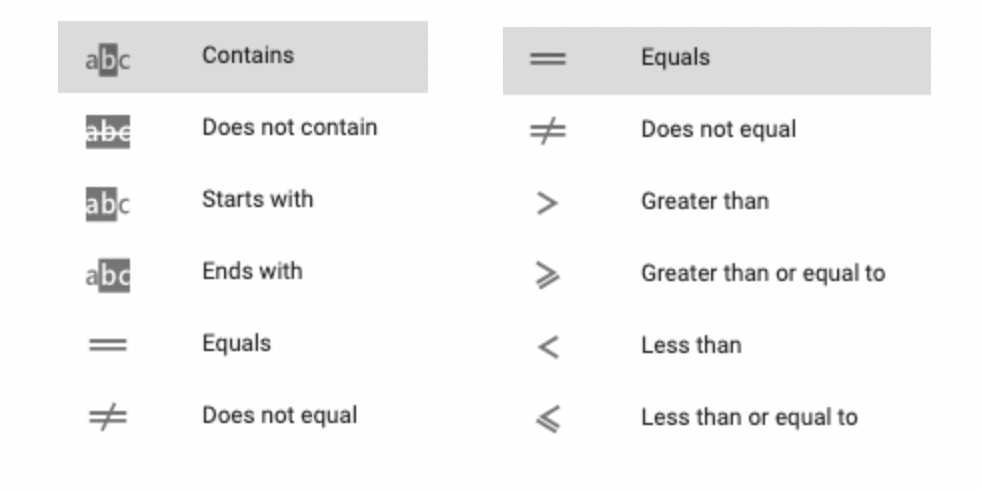
The table display (accessed from the Graph Options button) has a filter feature that enables you to display the data in different ways. You can use either string or number filters, as indicated below. Click on the filter icon to select the relevant filter option.
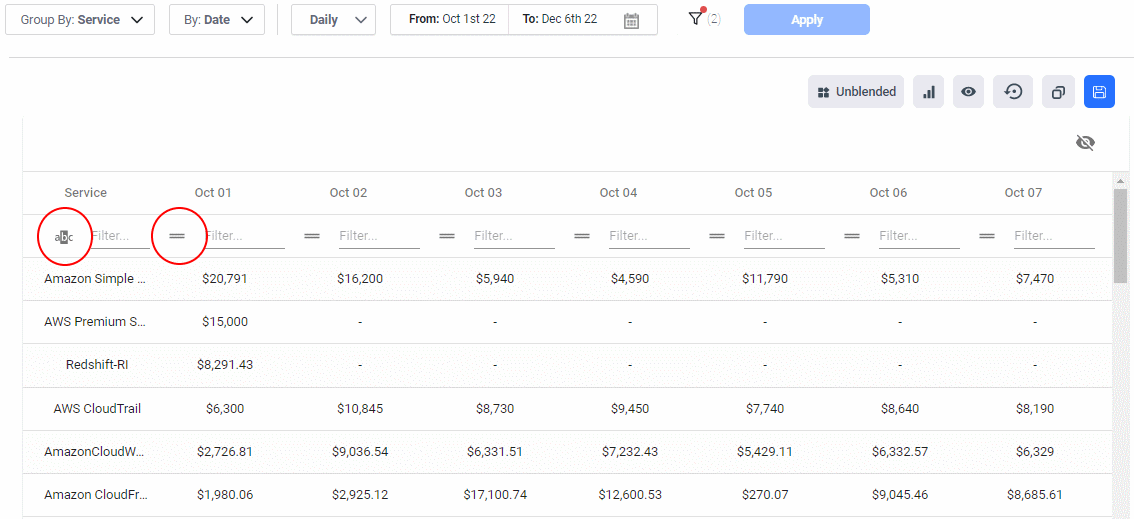
String filter options Number filter options
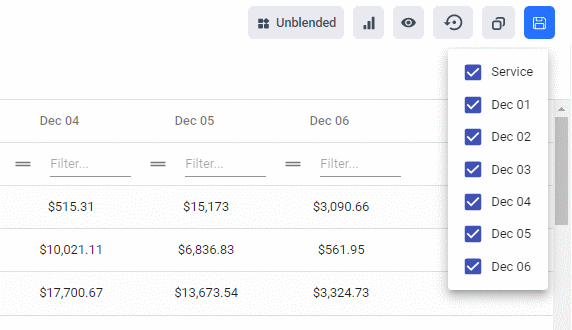
You can select the column(s) you want to show on the the table by clicking on the icon on the right side of the chart.

Cost types
The Cost & Usage Explorer enables you to review your costs according to the following cost types: Unblended/ Amortized/ Net-Unblended/ Net-Amortized/ Distributed costs.
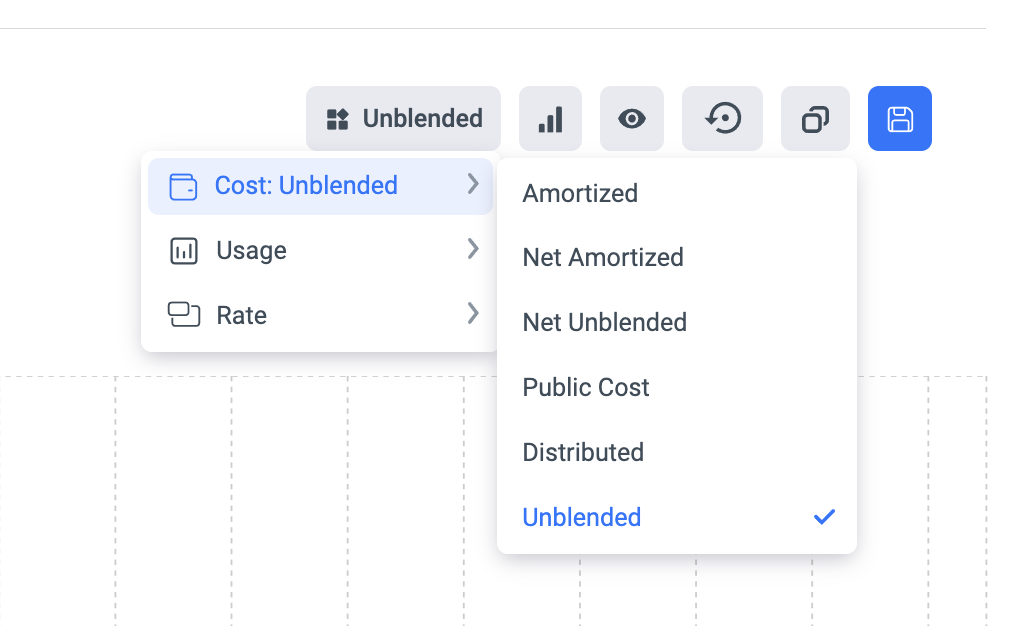
AWS:
- Unblended: Reflects the exact prices you'll be invoiced for from AWS. The Cost Type considers Discounts, Savings Plan charges, and RI, which appear in the invoice as distinct line items.
- Amortized: Amortized Cost relies on the Unblended Cost but also amortizes any upfront or recurring RI and Saving Plan charges across the resources they apply to spread across the billing period. This amortization is based on the amount of usage and therefore reflects the effective cost, considering the reduced rate from RIs and SPs.
- Net Unblended: The net unblended cost is the unblended cost after factoring in any discounts, credits, or other adjustments. This reflects the actual amount you are billed by AWS after taking into account any negotiated discounts, reserved instances, or other cost optimization measures applied to your AWS account (EDP Discounts, Private Rate Discounts, RI Volume Discounts, etc).
- Net Amortized: This Net Amortized cost amortizes the upfront and monthly reservation fees while including discounts such as RI volume discounts (EDP Discounts, Private Rate Discounts, RI Volume Discounts, etc).
- Distributed: In the distributed cost model, SP's fees will be moved from the account that purchased them to the resources that are using them.
- Public Cost: On demand pricing.
Azure:
- Actual Cost: Reflects the exact prices you'll be invoiced for from Azure. These are the costs of resource consumption without commitment allocation.
- Amortize Cost: take upfront reservations into account. If you have reserved instances in your Azure environment, you will likely want to see the daily or monthly quota of this reservation. This cost view splits the reservation quota into daily billing.
- List Cost: This cost measurement is available only for accounts with FOCUS export. List Cost represents the cost calculated by multiplying the list unit price and the corresponding Pricing Quantity. Note: When aggregating List Cost for savings calculations, it’s important to exclude either one-time or recurring charges that are paid to cover future eligible charges (e.g., Commitment-Based Discount) or the covered charges themselves.
GCP:
- Actual Cost: Reflects the exact prices you'll be invoiced for from Azure. These are the costs of resource consumption without commitment allocation.
Usage
The Cost & Usage Explorer enables you to analyze usage, as well as cost. When you click on the Usage toggle you need to select which quantity type you want to see.
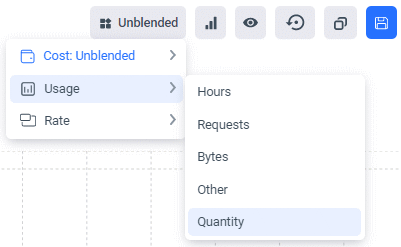
As shown below (EC2 > Compute), you can see the number of servers you have for each instance type, and then use Usage > Hours to view the hours used for each server.
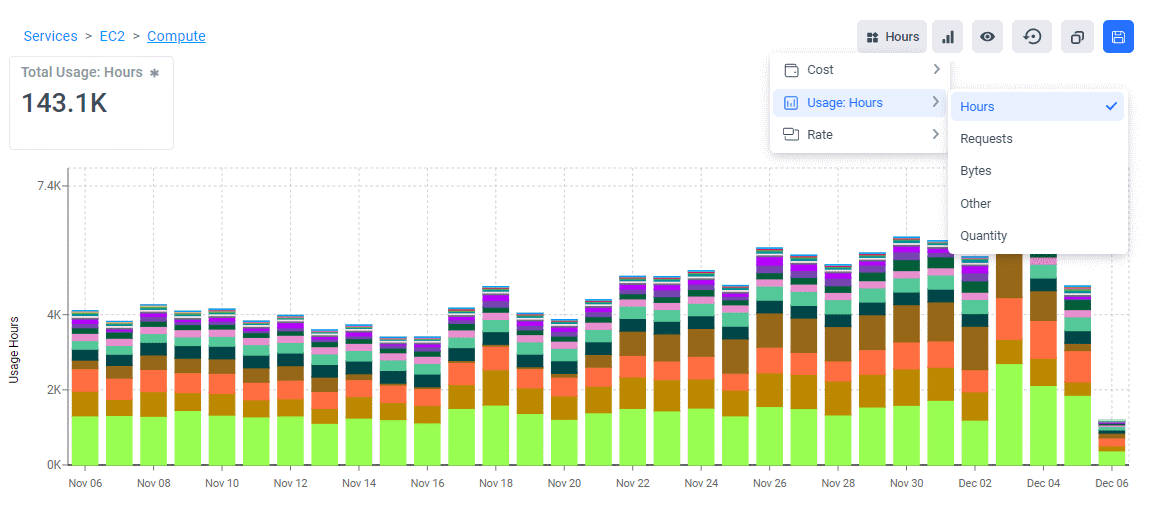
For Usage type = Bytes the present calculation is in Bits (1024)
Rate- Cost/Usage KPI generator
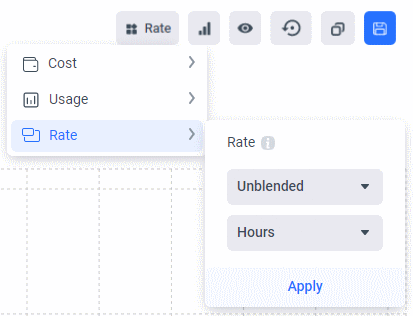
Using the Cost & Usage Explorer, you can also show the cost rate of a unit, meaning the ratio between cost and usage. This functionality is known as the Umbrella Cost Rate.
Note that when you select the Rate functionality, you need to select the relevant cost and usage types: select a cost type (Unblended, Net Unblended, Amortized, Net Amortized, or Public Cost) and usage type (Hours, Requests, Bytes, Other, or Quantity) from the dropdown lists.
Goals
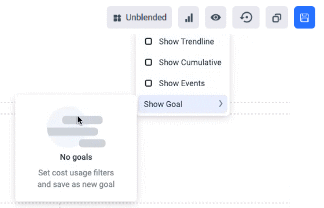
Use the Goals feature to monitor your cost metrics more closely by showing a “goal” on top of your usage stats (in the Cost & Usage Explorer). This enables you to compare actual to planned cost/usage/rate, and, in turn, set an alert for when a specific goal is reached.
To access Goals, click the View Options button, and then select Show Goal. In the displayed list of Goals, click on the Goal you want to display (note that only one Goal can be displayed at any one time). You can create a new Goal by clicking the Save & Export Options button, and then selecting Save as Goal > Create new.
Share URLs
After setting filters and other display parameters, as listed in the above sections, you can share a link to the displayed output with other users who have access to the same linked account, subscriptions, or projects. Users without this access cannot view the displayed data.
To share a URL of the displayed data, click the Copy Link icon and then share it with the relevant users.
Views
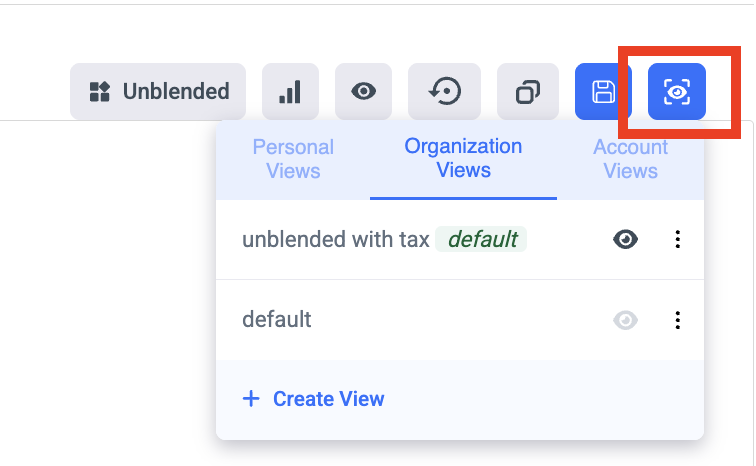
Creating Views: After applying your unique filters/ Grouping, click the following icon to save the filtered view for future use instead of creating it every time. In addition, you can set a custom view as the default view of the Cost and Usage Explorer page. The user can create the views under 3 different view types ,and each will make it available for different audiences:
- Personal Views- These views will be available only for the user who created them.
- Organization Views- These views will be available across all accounts of the same cloud provider, and in the case of an MSP also to his customers.
- Account Views- These views will be available to the specific account they were created from.
Updated about 2 months ago
