🚀 AWS Automatic Onboarding
The Automatic Onboarding process simplifies the onboarding process by running a script that validates the process and automates the setup of AWS permissions, policies, and data collection configurations.
Before starting the flow ensure that:
- You have AWS organization permissions to create IAM roles.
- The account you want to onboard is a payer account (not a linked account)
From the Accounts dropdown list, click Add account, click the AWS icon, and choose the Automatic option.
Automatic Onboarding Process Flow
The automatic onboarding script:
- Creates an IAM role in the payer account, allowing Umbrella to access cost data securely.
- Attaches required Policy to Role, to grant the necessary permissions.
- Configures Cost and Usage Report (CUR) with the proper configuration.
- Create an S3 bucket to host the CURs and configures Umbrella's access to it.
- (Optional) Connects Linked Accounts to Umbrella Cost:
- A Cloud Formation stack creates an IAM Policy and Role for each linked account in your organization, allowing Umbrella to provide cost saving recommendations for every linked account.
- The setup also includes automatic detection of future linked accounts, ensuring roles and policies are created for them automatically.
- The linked accounts will be validated automatically within one hour of the initial onboarding. No action is needed on the platform- after validation, the linked accounts will appear as connected on the Linked Accounts page.
Onboarding Script Validations Purpose and ActionsTo ensure a smooth onboarding experience, our script performs multiple validations:
- Ensures onboarding is performed on a payer account, not a linked account.
- Validates that Cost & Usage Reports (CUR) are enabled, correctly configured, and stored in an accessible S3 bucket.
- Checks that the IAM Role for Umbrella exists.
- Ensures the provided S3 bucket name is valid/ exists.
- Checks if the required Lambda/Stack exists.
Automatic Onboarding Wizard Steps
Choose how you would like to complete the onboarding

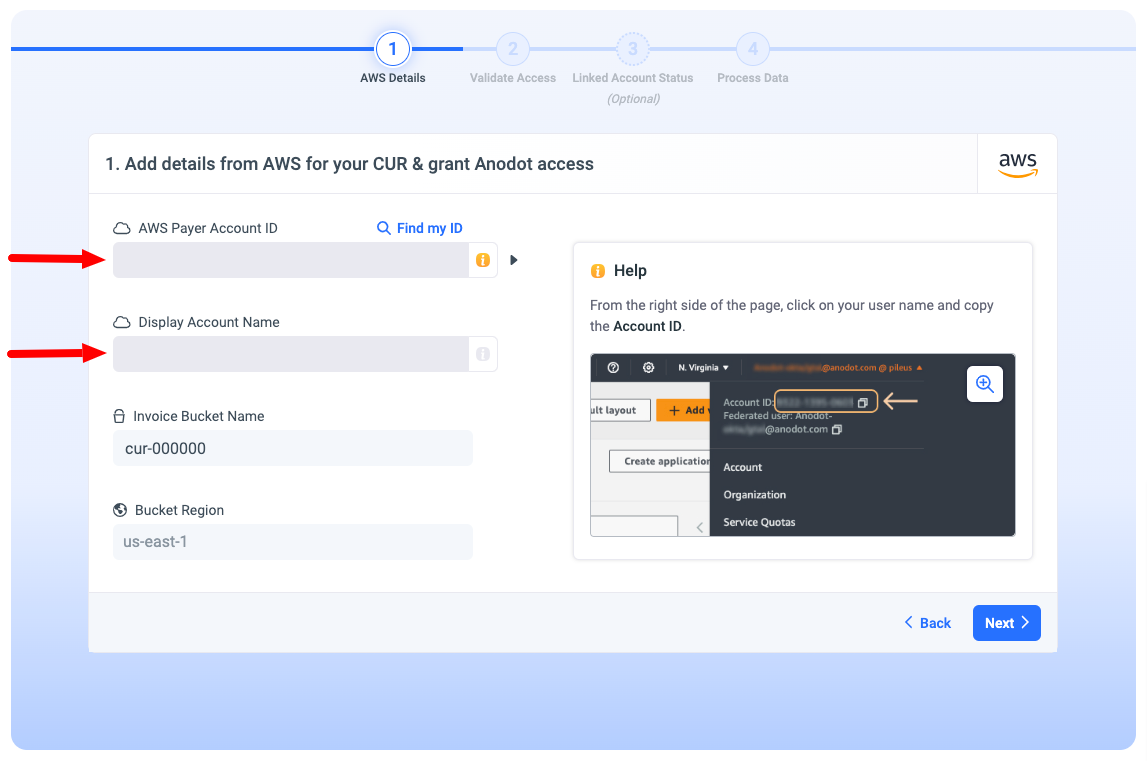
1. AWS Details
Enter your AWS Root Account ID, select the account name that will be displayed in Umbrella, and click Next.
Note: We will create the bucket that will host the CUR files in us-east-1 region by default.
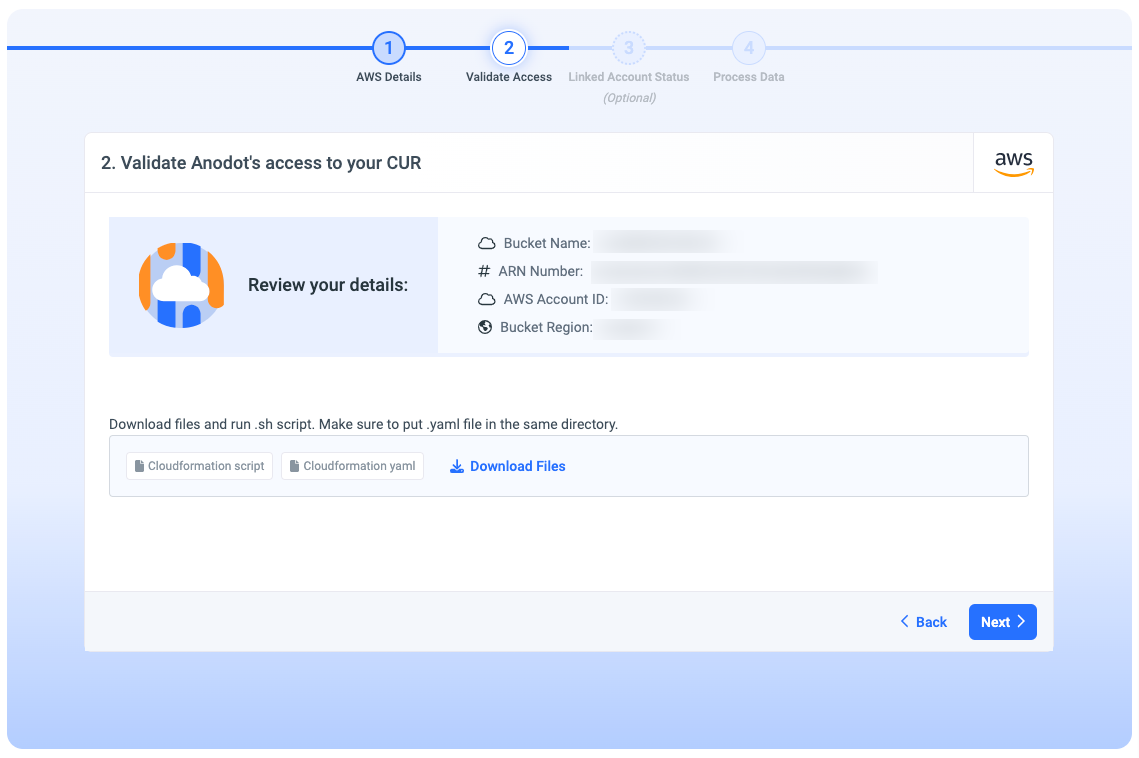
2. Validate Access
Download the two files (AnodotPayer.yaml + Connect2Anodot.sh).
There are two common options to run the script:
1. Automatic onboarding using CloudShell 💫
- In the AWS console navigate to CloudShell.
- Click on Action > Upload file, and upload the file AnodotPayer.yaml you just downloaded.
- Repeat step #2 for the file AnodotLinkedAccounts.yaml (If you selected the option to connect linked accounts).
- Repeat step #2 for the file deploy_anodot.sh.
- Run the command bash ./deploy_anodot.sh (this will run the script).
- Go to AWS CloudFormation page.
- When the status of the Stack anodot-Onboarding changes to CREATE_COMPLETE, it means the process is complete. You can now return to the Umbrella console and click Next to continue.

Note:
-
The files should be named as indicated above, avoiding duplicates such as AnodotPayer(1).yaml, AnodotPayer(2).yaml.
-
If you selected the option to connect linked accounts, you will see two stacks. There is no need to wait for the linked accounts stack to complete before continuing the onboarding process in the Umbrella console.

2. Automatic onboarding general flow (Preferred workspace such as Terminal)
- Prepare the AWS profile for your management account in AWS. If you do not have it, you can run the following command to see it: cat ~/.aws/config
- To verify that this is the account you want to onboard, run the following commands:
- export AWS_PROFILE=<profile-name>
- aws sts get-caller-identity
- Run the script by running the command: bash ./deploy_anodot.sh
- Go to the Umbrella platform, and click Next.
Validating AccountAfter clicking on Next, Umbrella validates all your AWS details. This step can take up to 1 hour.
We will inform you once the validation is done so that you will be able to connect your linked account.
Note: In case you do not want to connect your linked accounts you can ignore the email and we will notify you again after the entire process is done and you can see data in your account.
3. (Optional) Linked Account Status
Connect your linked accounts to Umbrella to see recommendations.
- If you connected your linked accounts automatically as part of the onboarding automation, skip this step.
- If not, for guidance on how to connect your linked accounts click here .
4. Process Data
This step can take up to 48 hours (depending on when we will receive your files from AWS).
We will notify you by email once it is done and you can see data in your account.
For Umbrella Cost to be able to create recommendations for your account, you will need to connect all the linked accounts to the platform. You can find the full instructions here.