Defining Dashboard Settings
This article describes the various settings you can define for a dashboard, and includes:
- Setting a default dashboard
- Defining permissions settings
- Scheduling a dashboard report
- Editing a dashboard
- Cloning a dashboard
- Deleting a dashboard
Dashboard settings are defined in the Dashboard screen, accessed by clicking Cost & Usage > Dashboards. Note that you can also save a dashboard as a template (as described in Dashboard Templates).
Setting a default dashboard
To set a dashboard as the default dashboard, from the More Info icon in the relevant dashboard row, and then select Set as Default.

A star icon is displayed in the dashboard row, indicating that the dashboard is now the default dashboard displayed when you login.
Defining permissions settings
To define permissions settings:
- Click the More Info icon in the relevant dashboard row, and then select Permissions settings. The Share Settings dialog is displayed.

- Select the relevant permissions settings from the dropdown box:
- Only me: The dashboard settings are available only to you.
- Current role: The dashboard settings are available to users assigned with the current role, meaning any other user with the same role as you.
- Specific roles: The dashboard settings are available to users assigned with the selected role.
- Specific users: The dashboard settings are available to users defined by entering their email address or all members of a selected Slack channel.
- Specific customers: The dashboard settings are available to selected customers.
- Everyone: The dashboard settings are available to all users.
- (Optional) Click Set Default to set these permissions as the default for all dashboards.
- Click Save.
Scheduling a dashboard report
To schedule a dashboard report:
-
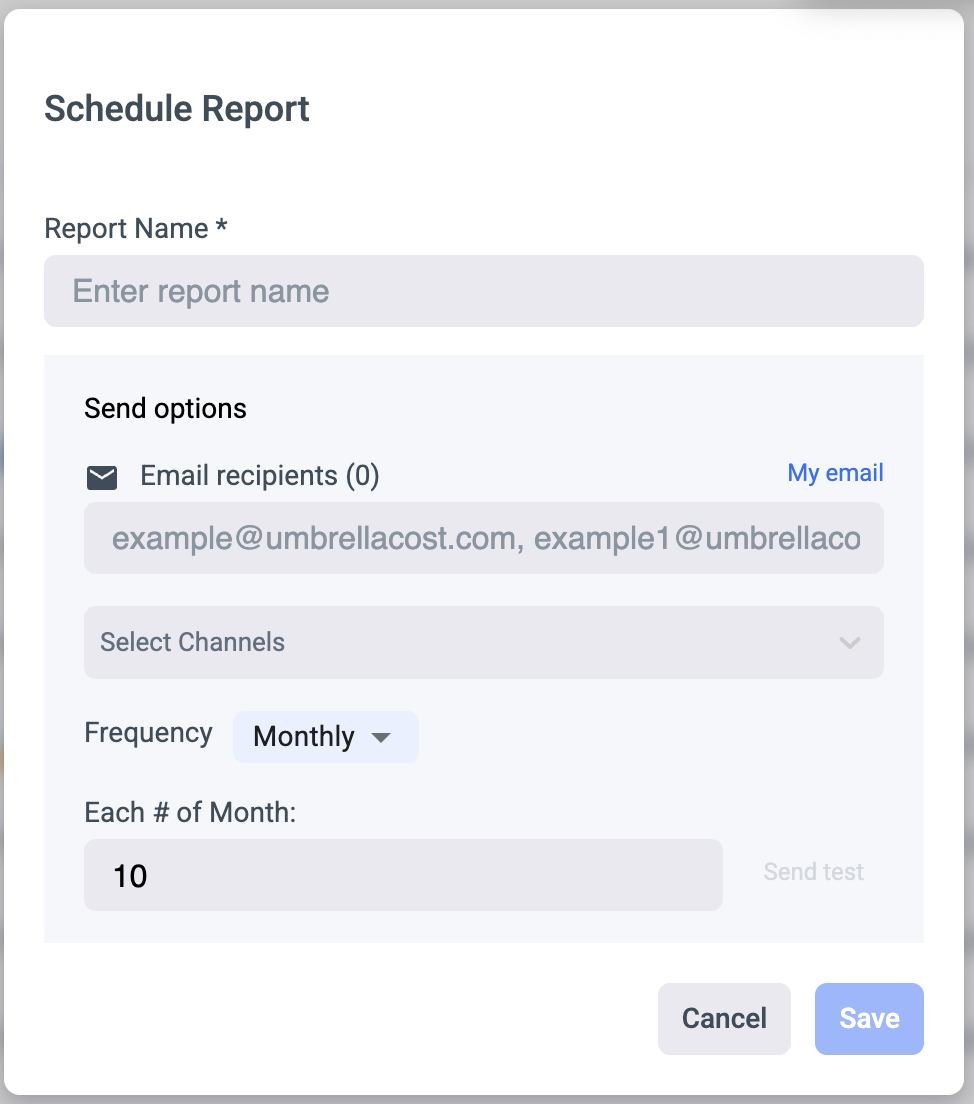
Click the More Info icon in the relevant dashboard row, and then select Schedule Report. The Schedule Report dialog is displayed.

-
Define a name for the report, and then add the recipients by entering the relevant email addresses. You can also select a Slack channel as a recipient; all users in the Slack channel will receive the report.
-
Select the frequency from one of the following options :
- Weekly
- Monthly
- Quarterly
- Custom (define a start date and your own custom frequency)
-
Each # of Month - refers to the day in the Month the report will be sent in.
-
(Optional) Click Test to send a test report.
-
Click Save.
Editing a dashboard
To edit a dashboard:
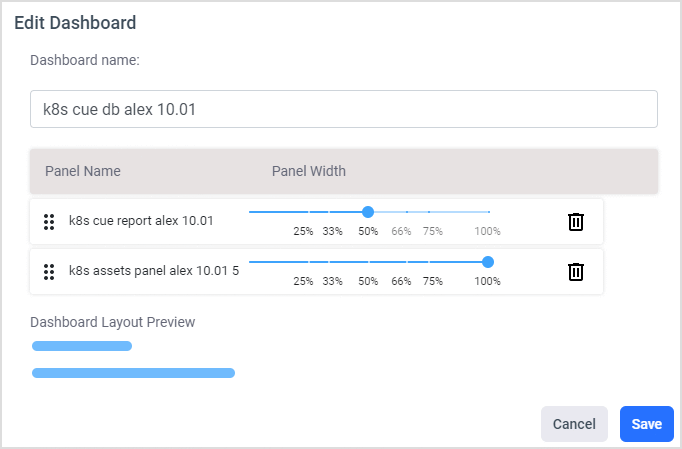
- Click the More Info icon in the relevant dashboard row, and then select Edit. The Edit Dashboard dialog is displayed.

- Edit the dashboard, as required. For example, you can edit the dashboard name, and reorder or delete panels on the dashboard. For more information, see Introduction to Dashboards .
- Click Save.
Cloning a dashboard
To clone a dashboard:
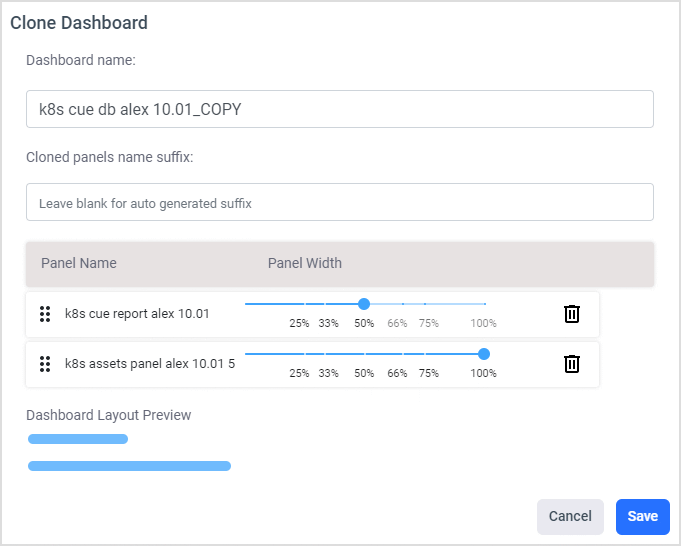
- Click the More Info icon in the relevant dashboard row, and then select Clone. The Clone Dashboard dialog is displayed.

- In the Dashboard name field, you can add a suffix to the cloned dashboard. Otherwise, leave the field blank and _COPY will automatically be suffixed to the dashboard name.
- In the Cloned panels name suffix field, add a suffix that will be added to the cloned panels. Otherwise, leave the field blank and _COPY will automatically be suffixed to the panel.
- Click Save.
Deleting a dashboard
To delete a dashboard:
- Click the More Info icon in the relevant dashboard row, and then select Delete.
- In the displayed confirmation message, click Delete.
Updated 6 months ago
