Connect your linked accounts
This article describes how to integrate your linked accounts with Umbrella for us to create recommendations for each linked account. In this process, you'll assign a read-only policy to each linked account and associate it with a role.
There are few methods to connect your linked accounts:
-
Connect All Linked Accounts - Current & Future (Recommended 💫)
Use a Stack in your payer account that grants read-only permissions to all current and future linked accounts under your payer account. This ensures that any new linked accounts will automatically be included without requiring any action. -
Connect All Current Available Linked Accounts- Current
This StackSet will propagate the necessary read-only permissions across all linked accounts under the payer account.Note: In case some of your linked accounts already have the needed permissions, this option is not relevant. Instead, we recommend using the third option.
-
Connect Linked Accounts Based on Tagging
Create a Stack in your payer account that applies read-only permissions to linked accounts based on specific tags. This way, only accounts with the defined tag will be connected to Umbrella. -
Connect Each Linked Account manually via the Umbrella UI
Best suited for small accounts.
You can manually connect each linked account from within the Umbrella interface by assigning read-only permissions for each account.
Connect All Linked Accounts (Including all future Accounts)
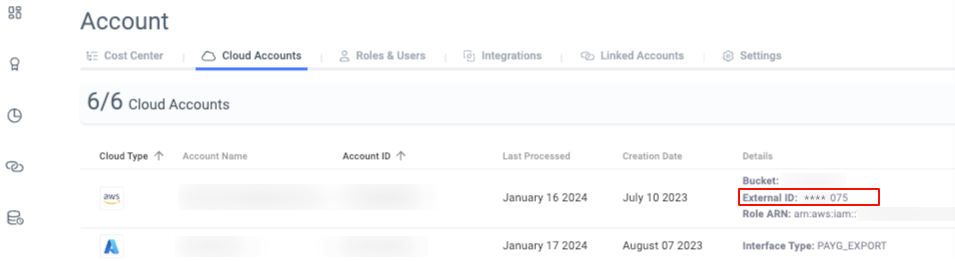
- From Umbrella's main page click on Account.

- Click on the Cloud Accounts tab and copy the external ID value of your account.
-
Log into the AWS console for the payer account: https://aws.amazon.com/
-
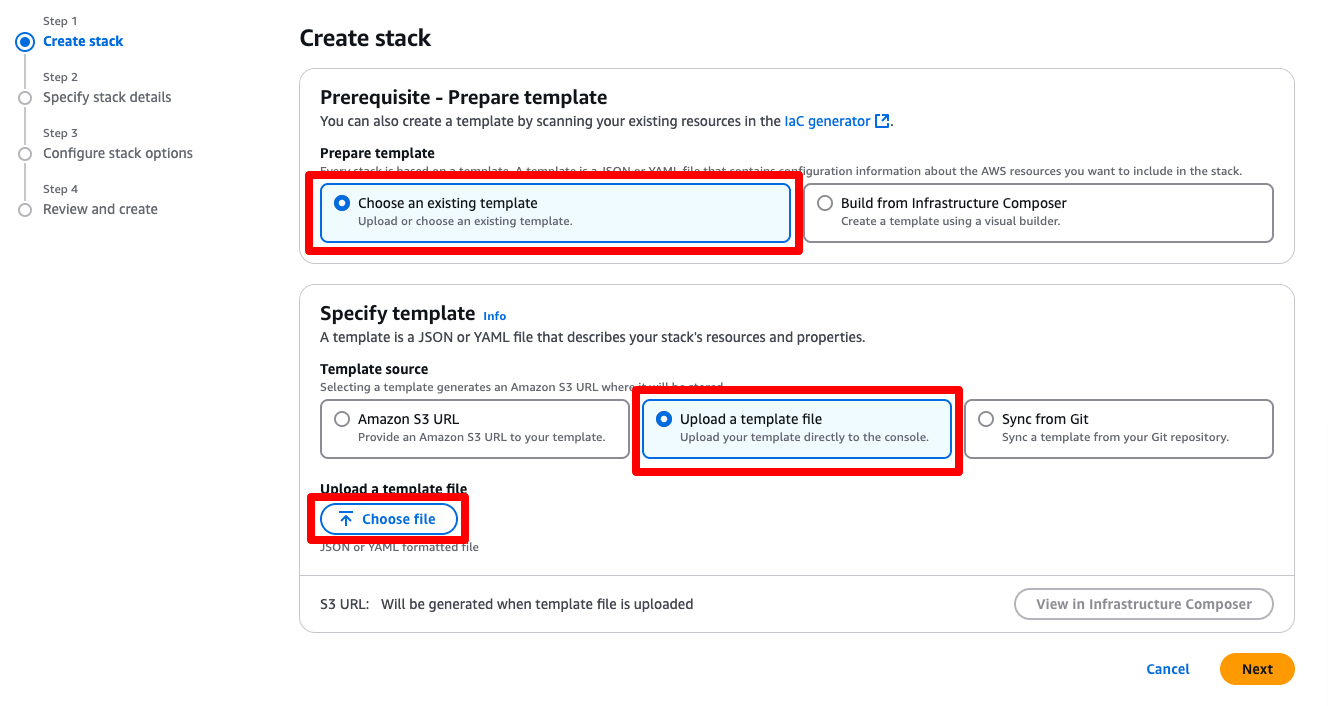
Navigate to CloudFormation > Stacks and click on Create Stack.

- For the Prepare template, select the Choose an existing template. Then, select Upload a template file, upload the following file, and click on Next.
-
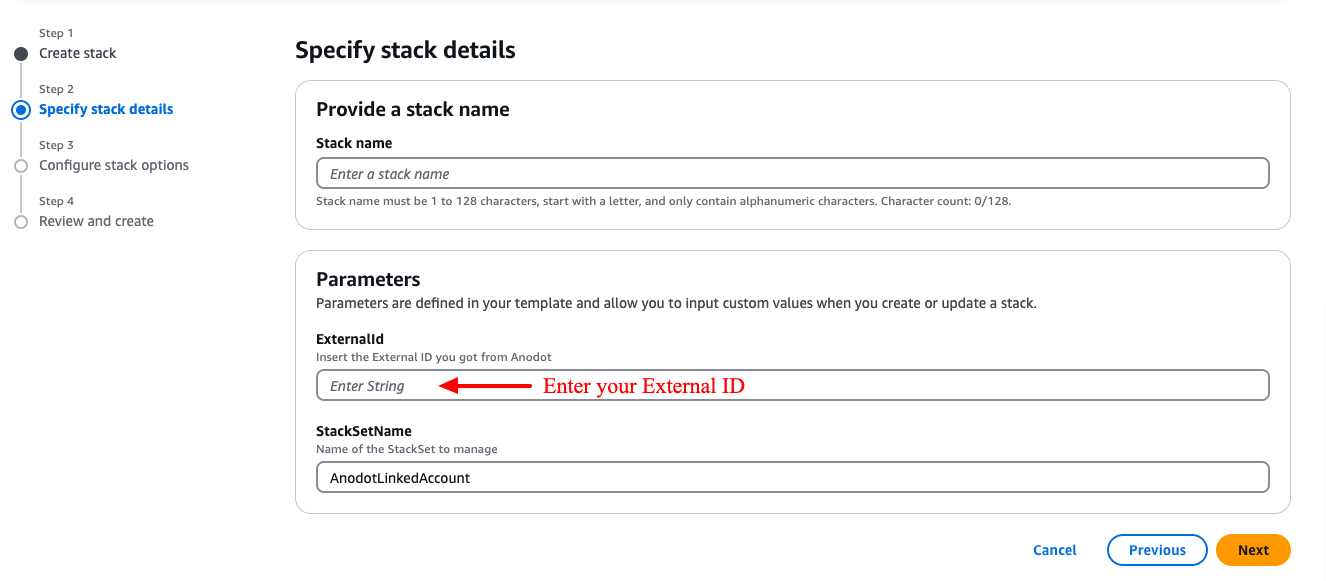
Choose a name for the Stack, enter the external ID you copied in step #2, and click on Next.
-
Click on Next.
-
On Umbrella, navigate to Accounts > Linked account page, and click on Validate All Connection to validate a successful connection.

- You will start seeing recommendations the next time your invoice runs (which occurs automatically every day).
Connect All Linked Accounts Under the Payer Account
-
From Umbrella's main page click on Account.

-
Click on the Cloud Accounts tab and copy the external ID value of your account.
-
Log into the AWS console for the payer account: https://aws.amazon.com/
-
Navigate to CloudFormation > StackSet and click on Create StackSet.

-
Use the following template URL and click on Next.
https://pileus-cloudformation-public.s3.amazonaws.com/PileuseOnboardingCFT.json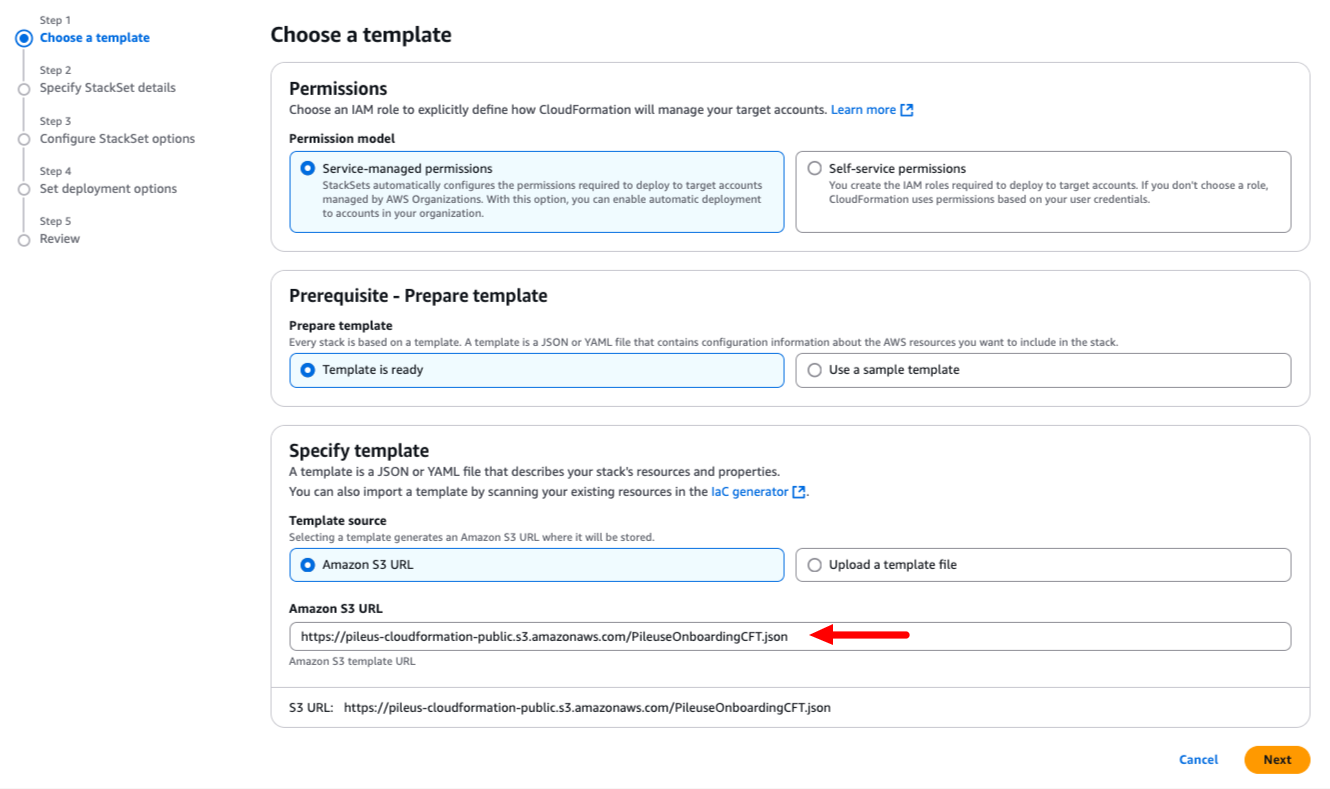
-
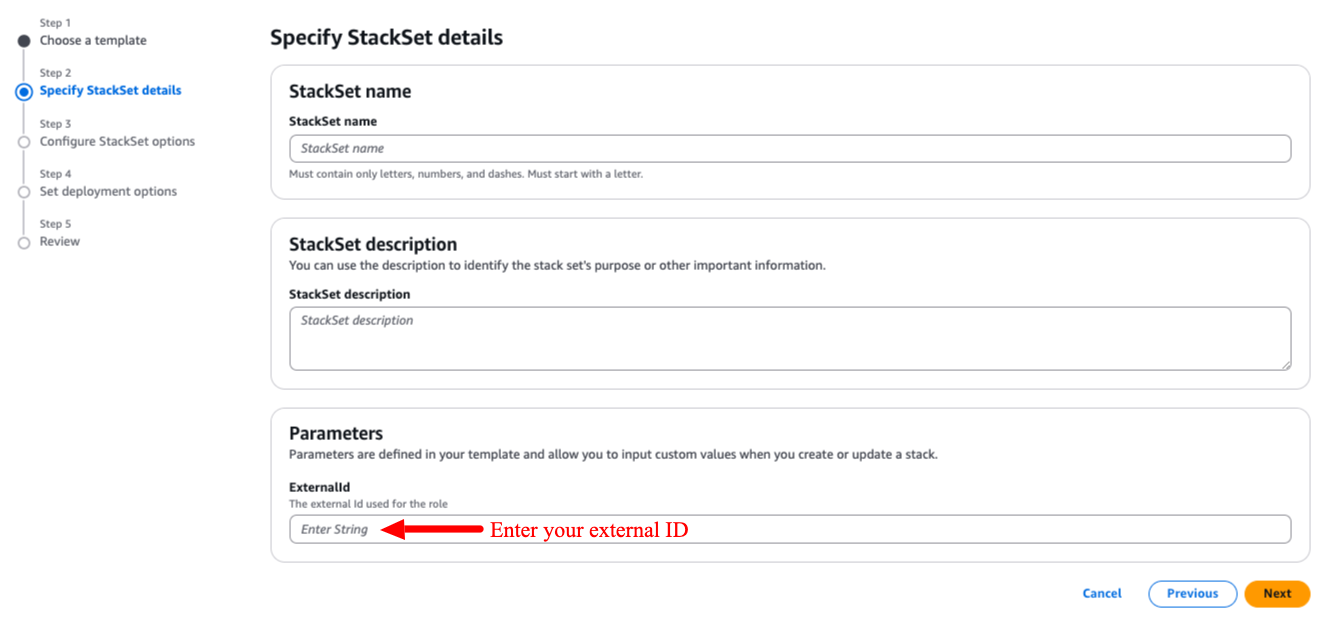
Name the StackSet, enter the External ID you copied in Step 2, and Click on Next.
-
(Optional) Enter any tags, select Inactive or Active execution, and click on Next.
-
Configure the deployment options (setting a region is required) and click on Next.
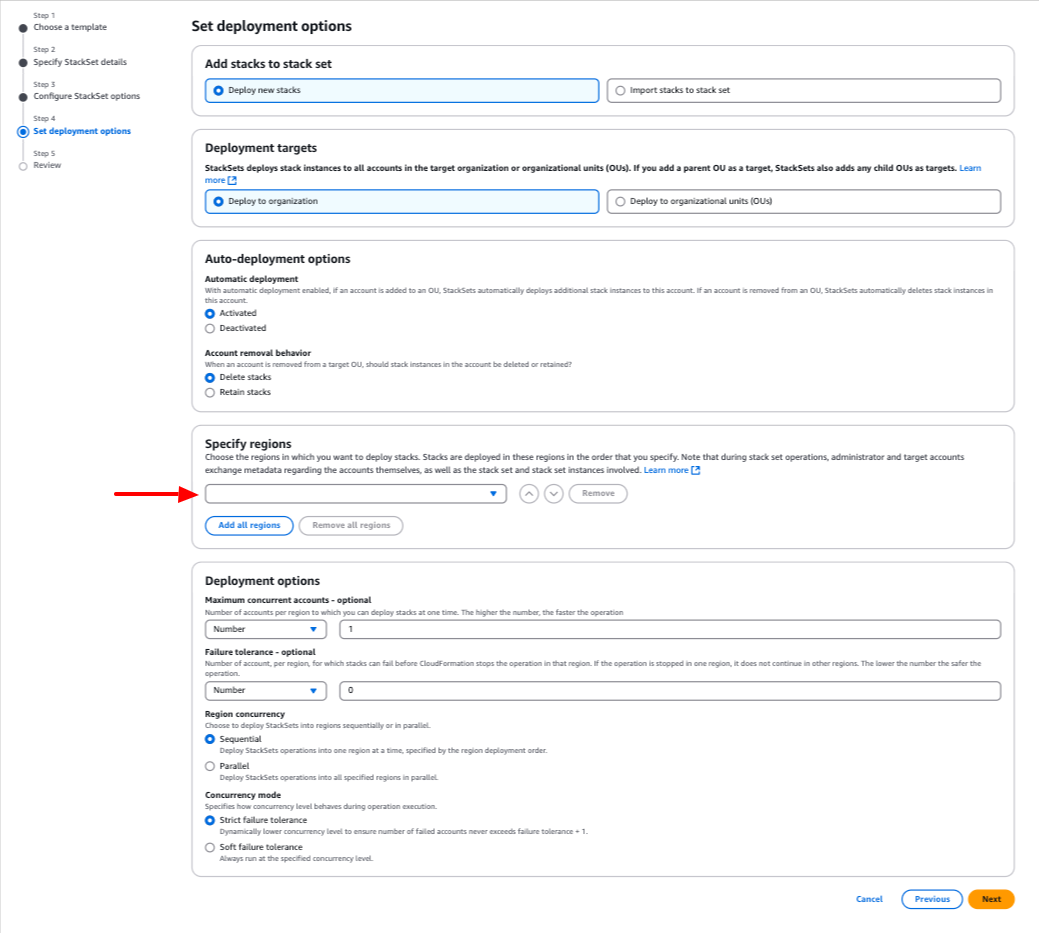
-
Review your settings, and click Submit.
-
On Umbrella, navigate to Accounts > Linked account page, and click on Validate All Connection to validate a successful connection.
- You will start seeing recommendations the next time your invoice runs (which occurs automatically every day).
Connect Linked Accounts Based on Tagging
- From Umbrella's main page, click on Account.

- Click on the Cloud Accounts tab and copy the external ID value of your account.
-
Log into the AWS console for the payer account: https://aws.amazon.com/
-
Navigate to CloudFormation > Stacks and click on Create Stack.
-
Choose the options as displayed below, upload the following file, and click on Next.
-
Choose a name for the Stack, enter the external ID you copied in step #2, and click on Next.
-
Click on Next.
-
For each linked account that you want us to apply the policy with permissions for, add the following tag: Umbrella: onboarded
-
On Umbrella, navigate to Accounts > Linked account page, and click on Validate All Connection to validate a successful connection.
- The next time your invoice runs (which occurs automatically every day), you will start seeing recommendations.
Manual Connection for Each Linked Account via the Umbrella UI
-
In the AWS Console, log in to the linked account that you would like to connect to Umbrella.
-
On the Umbrella platform, click your username (in the top right corner) and click Account.

-
Click the Linked Accounts tab.

- Click Open AWS platform to connect in the relevant linked account row.
You will be redirected to a CloudFormation stack creation page, where the Umbrella role will be created for the linked account.
- In the AWS Console, click Create Stack.
- On the Umbrella platform, click on Validate Connection to validate a successful connection.
Note: In case you want to connect multiple linked accounts you can click on Validate All Connections
You should now see that the Verification Status is connected as displayed below.
