Bill-Source Account Onboarding
This article describes how to get started with a Billing Transfer onboarding of Bill-Source Account.
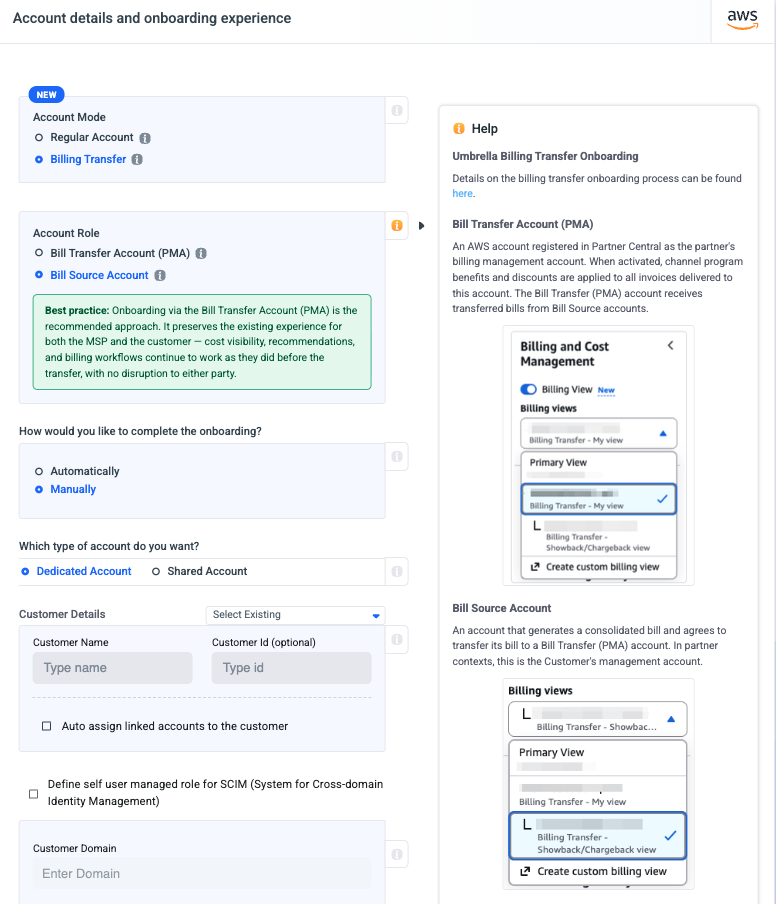
Bill Source AccountThe customer's management account that transfers its bill to the PMA.
An account that generates a consolidated bill and agrees to transfer its bill to a Bill Transfer (PMA) account. In partner contexts, this is the Customer's management account.
Before starting the process, ensure that:
- You have AWS organization permissions to create IAM roles.
- The account you want to onboard is a payer account (not a linked account)
Attention, once the billing transfer initiation is approved:
- Effective Date-The billing transfer for this account will take effect starting from the next billing month.
- Historical Data Unavailability- Historical data for this account will no longer be accessible under the new billing transfer or source accounts.
Manual Onboarding Process Flow
Step 0: Onboarding Mode Configuration
- From the Accounts dropdown list, click Add account, click the AWS icon, and choose the Billing Transfer.
- The standard Automatically / Manually selection is shown as before, with the existing checkbox for connecting linked accounts.
1. Create a CUR file and activate tag allocation.
- Each Billing View maintains its own separate set of exports. The partner view export and the showback/chargeback view export are completely independent, they write to their own S3 paths and contain different cost data.
- You must switch the active Billing View in the left navigation before creating each export, as the Data Exports page always reflects the currently selected view.
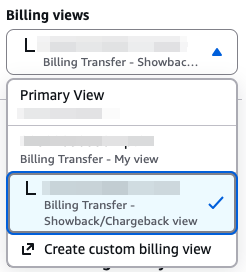
- To create a separate CUR export for the customer-facing cost data, sign in to the AWS Billing and Cost Management console on the Billing Transfer - Showback/Chargeback. In the left navigation, make sure the Billing View toggle is enabled (it may be marked as "New"). This view reflects the rates configured through Billing Conductor, which are the markups, discounts, and custom pricing that the partner wants the customer to see.
- Then select the appropriate view from the Billing Views dropdown.
- With the Showback/Chargeback view active, navigate again to Cost and Usage Analysis and then Data Exports.
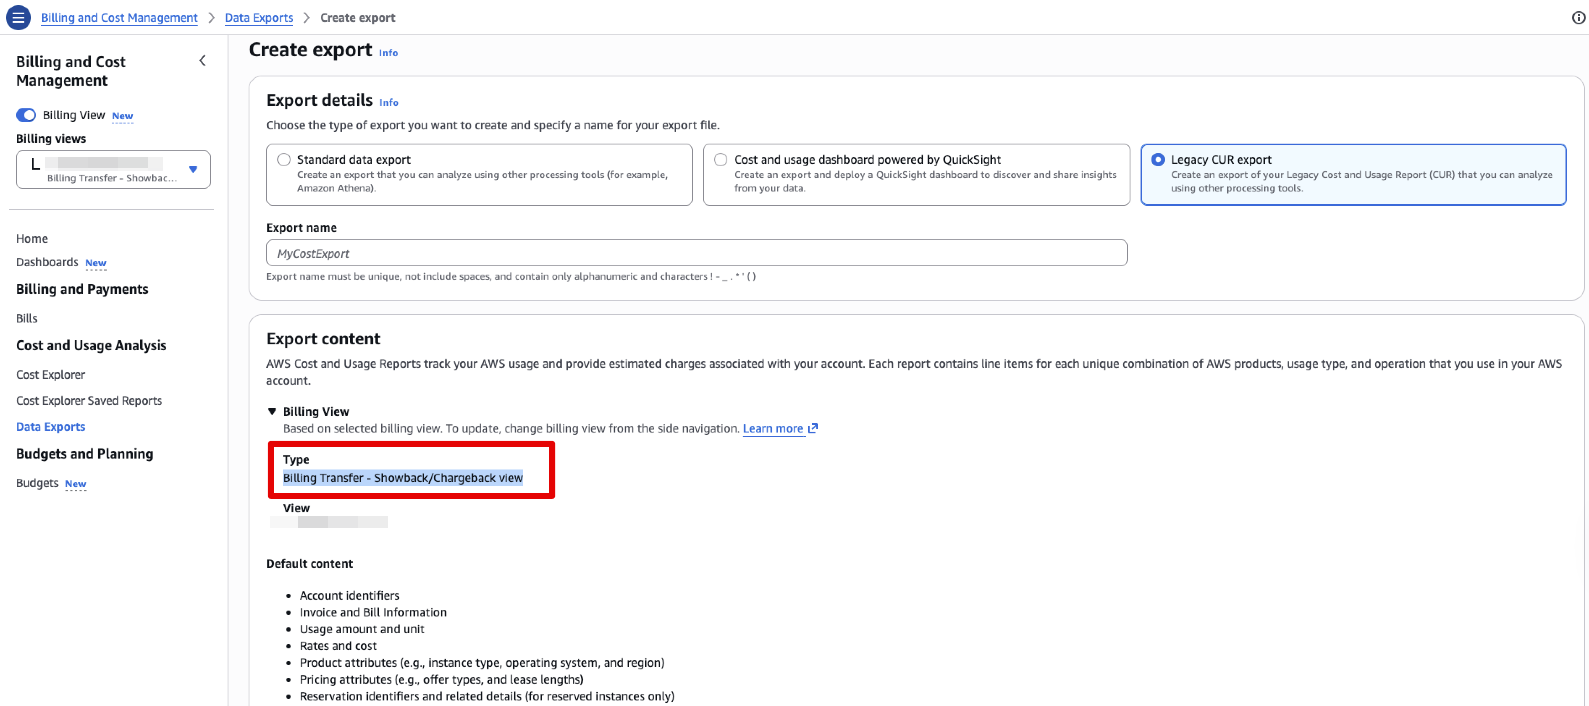
- Click Create export and choose "Legacy CUR export".
- Enter a different export name from the one used for the partner view, for example using a suffix like "-chargeback" to distinguish it. Which must be unique, cannot include spaces, and may only contain alphanumeric characters along with ! - _ . * ' ( ).
- Under Export content, verify that the Billing View section now displays "Billing Transfer - Showback/Chargeback view" as the type.
We recommend using UmbrellaCostCUR
Bill Source account-Showback/Chargeback view CUR Expor
- Define the following in the export details:
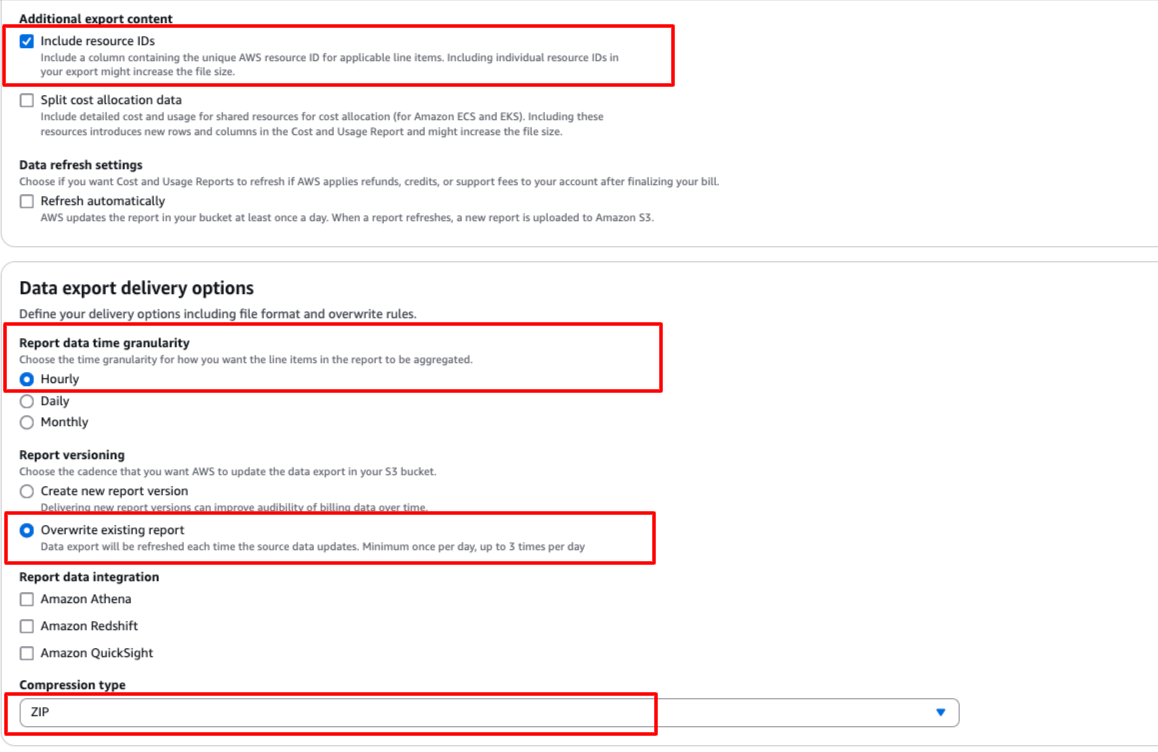
- Under the Additional export content choose Include resource IDs.
- Choose hourly time granularity.
- Under Report versioning choose the Overwrite existing report option.
- Make sure that the Compression type is ZIP.
- Under Data export storage settings choose the option to configure S3 bucket (the bucket name should be unique within the PMA).
- Click on create a new bucket and name it as you like (we recommend UmbrellaCostCUR).

- Note the region and click Create Bucket.
- Note the region of the bucket as you will have to enter it in the Umbrella Cost platform.
- The bucket should be dedicated to Umbrella's CUR files (not contain any other CUR files).
- The bucket name should be unique within the PMA.
- In the S3 path prefix enter the value: Umbrella.
- Click on Create Report.
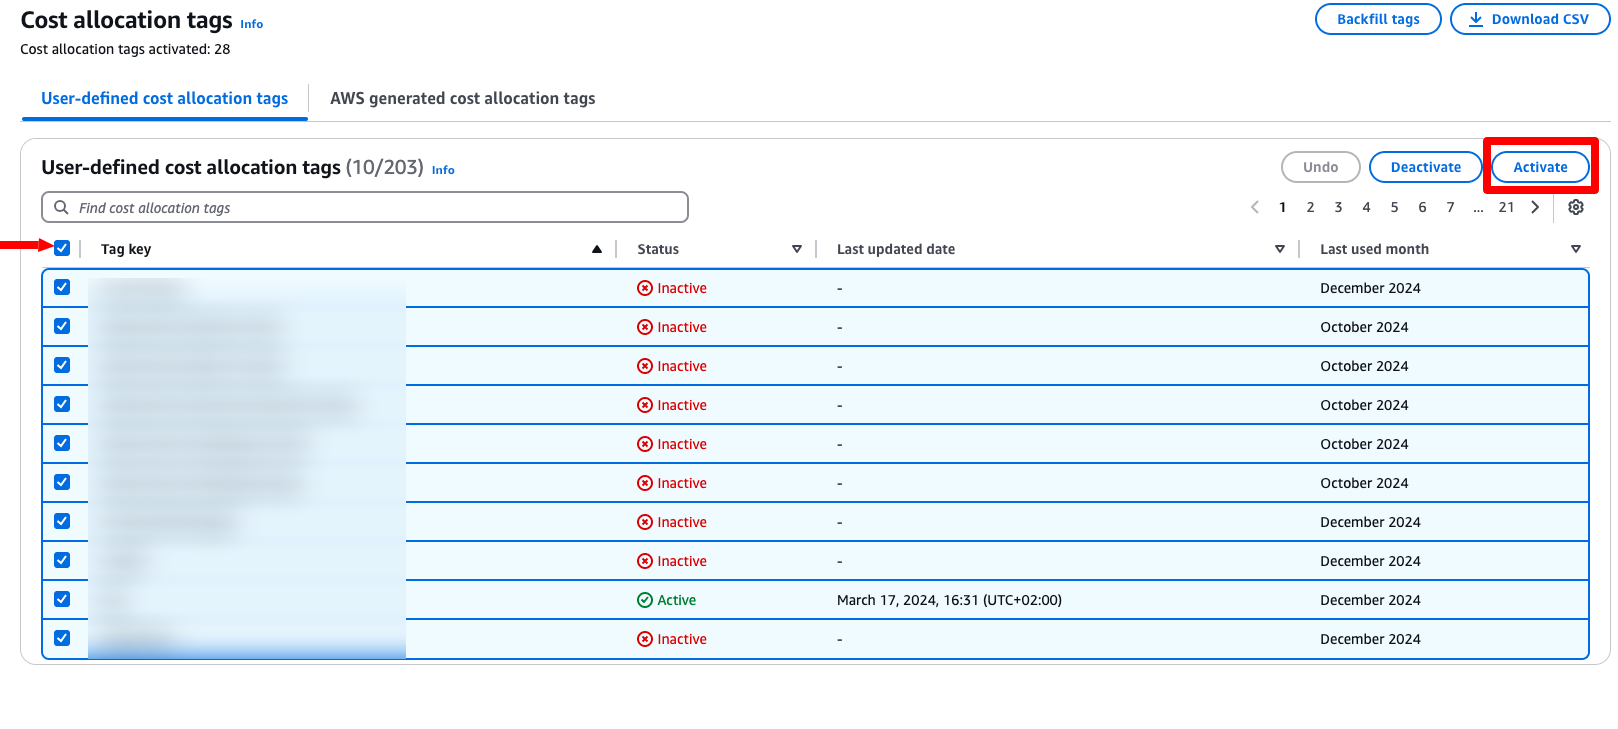
In order to see the Tag values in the CUR follow the below steps:
- From the left menu click on Cost allocation tags.
- Select all the tags and click Activate.
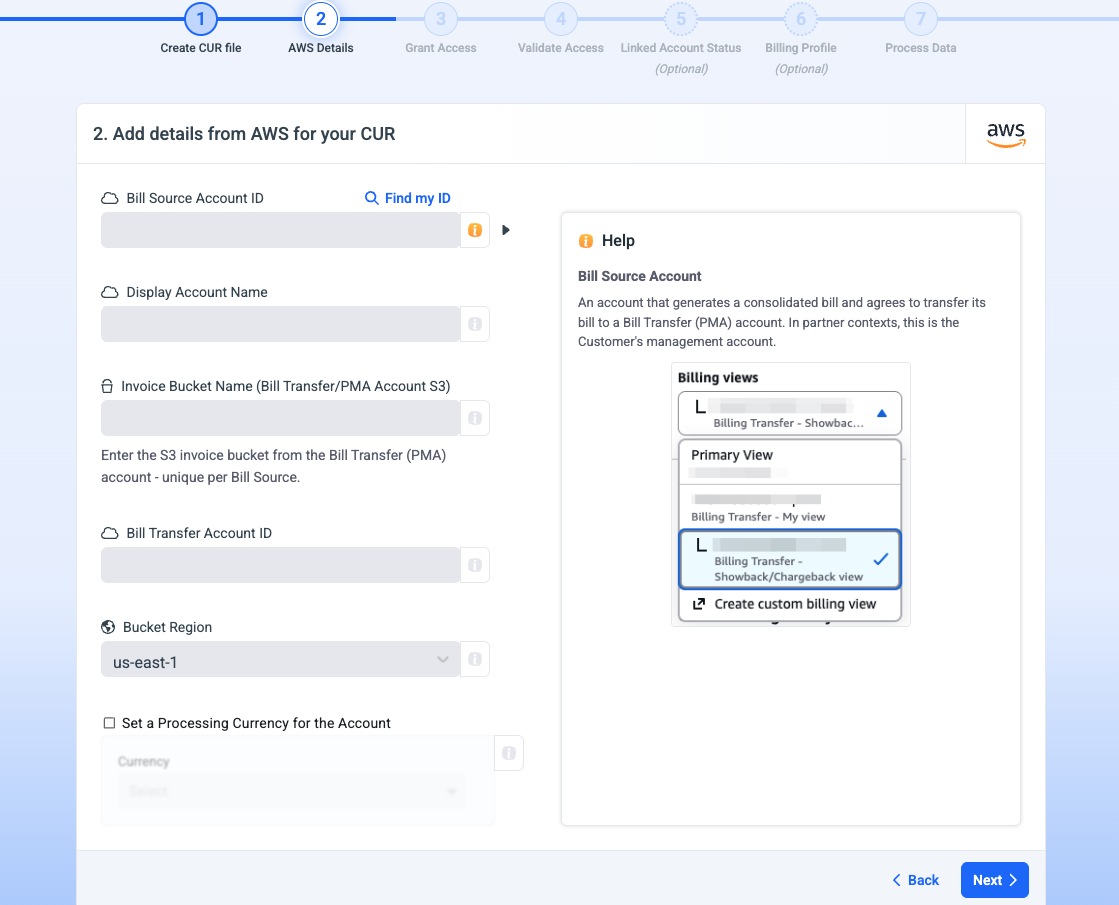
2. AWS Details
- Enter the
- Bill-Source Account ID
- Account display name in Umbrella
- Invoice Bucket name
- Bill-Transfer Account ID- Bill Transfer/PMA Account S3
- Bucket region from the previous step.
- Set Processing Currency if needed.
- Enter the Display Account Name shown in Umbrella and click Next.
3. Grant Access
Grant access to Umbrella Cost using AWS CLI or manual flow for the Bill-Transfer and Bill-Source account.
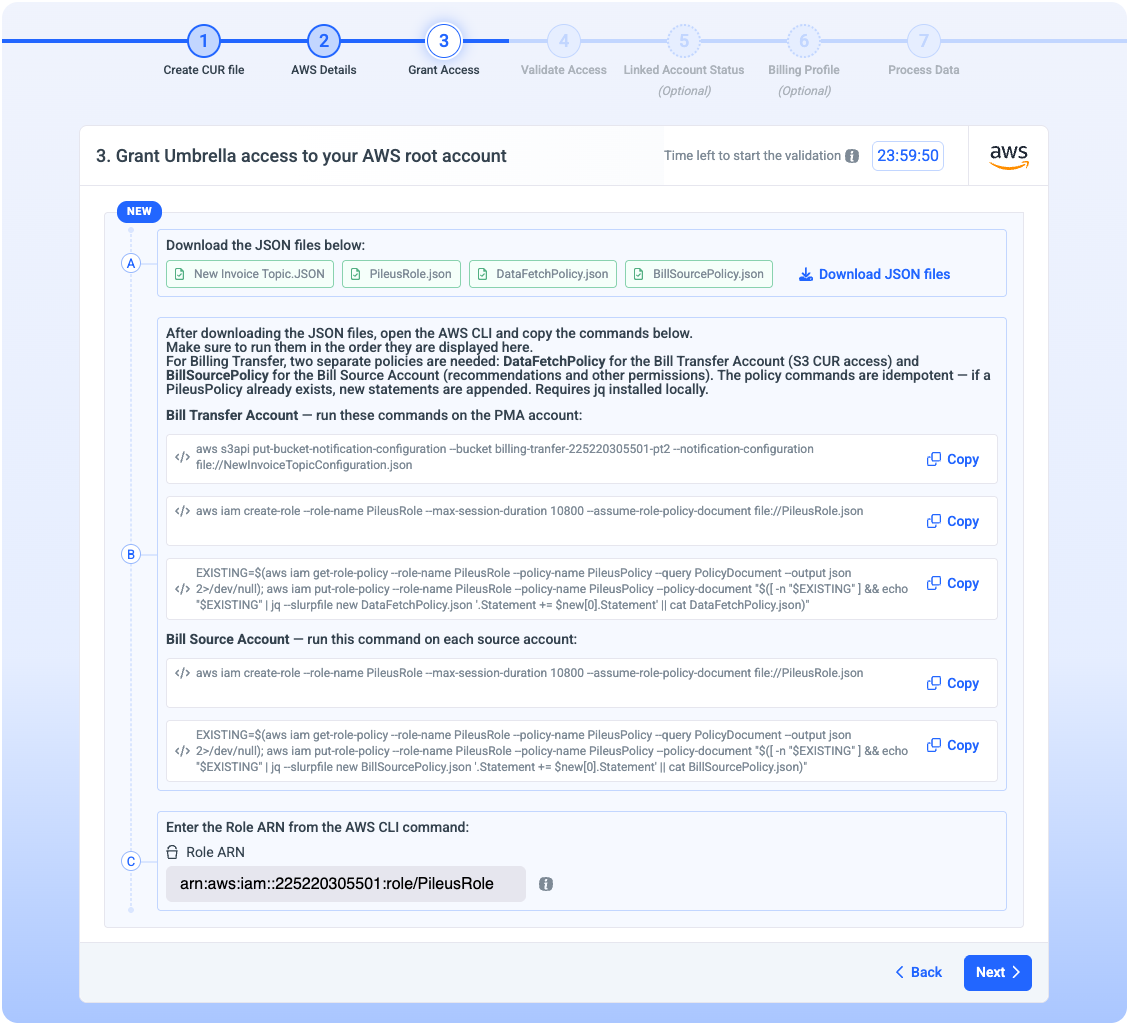
Grant Access using AWS CLI:
- Step A- Download all the JSON files from step.
- Step B- Navigate to the AWS portal, open the AWS CLI, and copy and run the commands.
- Step C- Copy the Role ARN from the CLI and paste it in step C in Umbrella. Then, click on Next.
Grant Access using Manual flow:
Download all the JSON files from step A (as shown in the screenshot above). Then, create in the AWS console Policy, Role, and Event Notification as described as follow:
Create Policy
- Navigate to the AWS portal IAM > Policies page, and click Create policy.
- Switch to the JSON editor, delete the template policy, and paste the text from the PileusPolicy.json file you downloaded. Then click Next.
- Set the policy name to PileusPolicy, and click Create policy.
Create Role
- Navigate to the AWS portal IAM > Roles page, and click Create role.
- Select the Another AWS account option, enter Umbrella account ID (932213950603), and click Next.
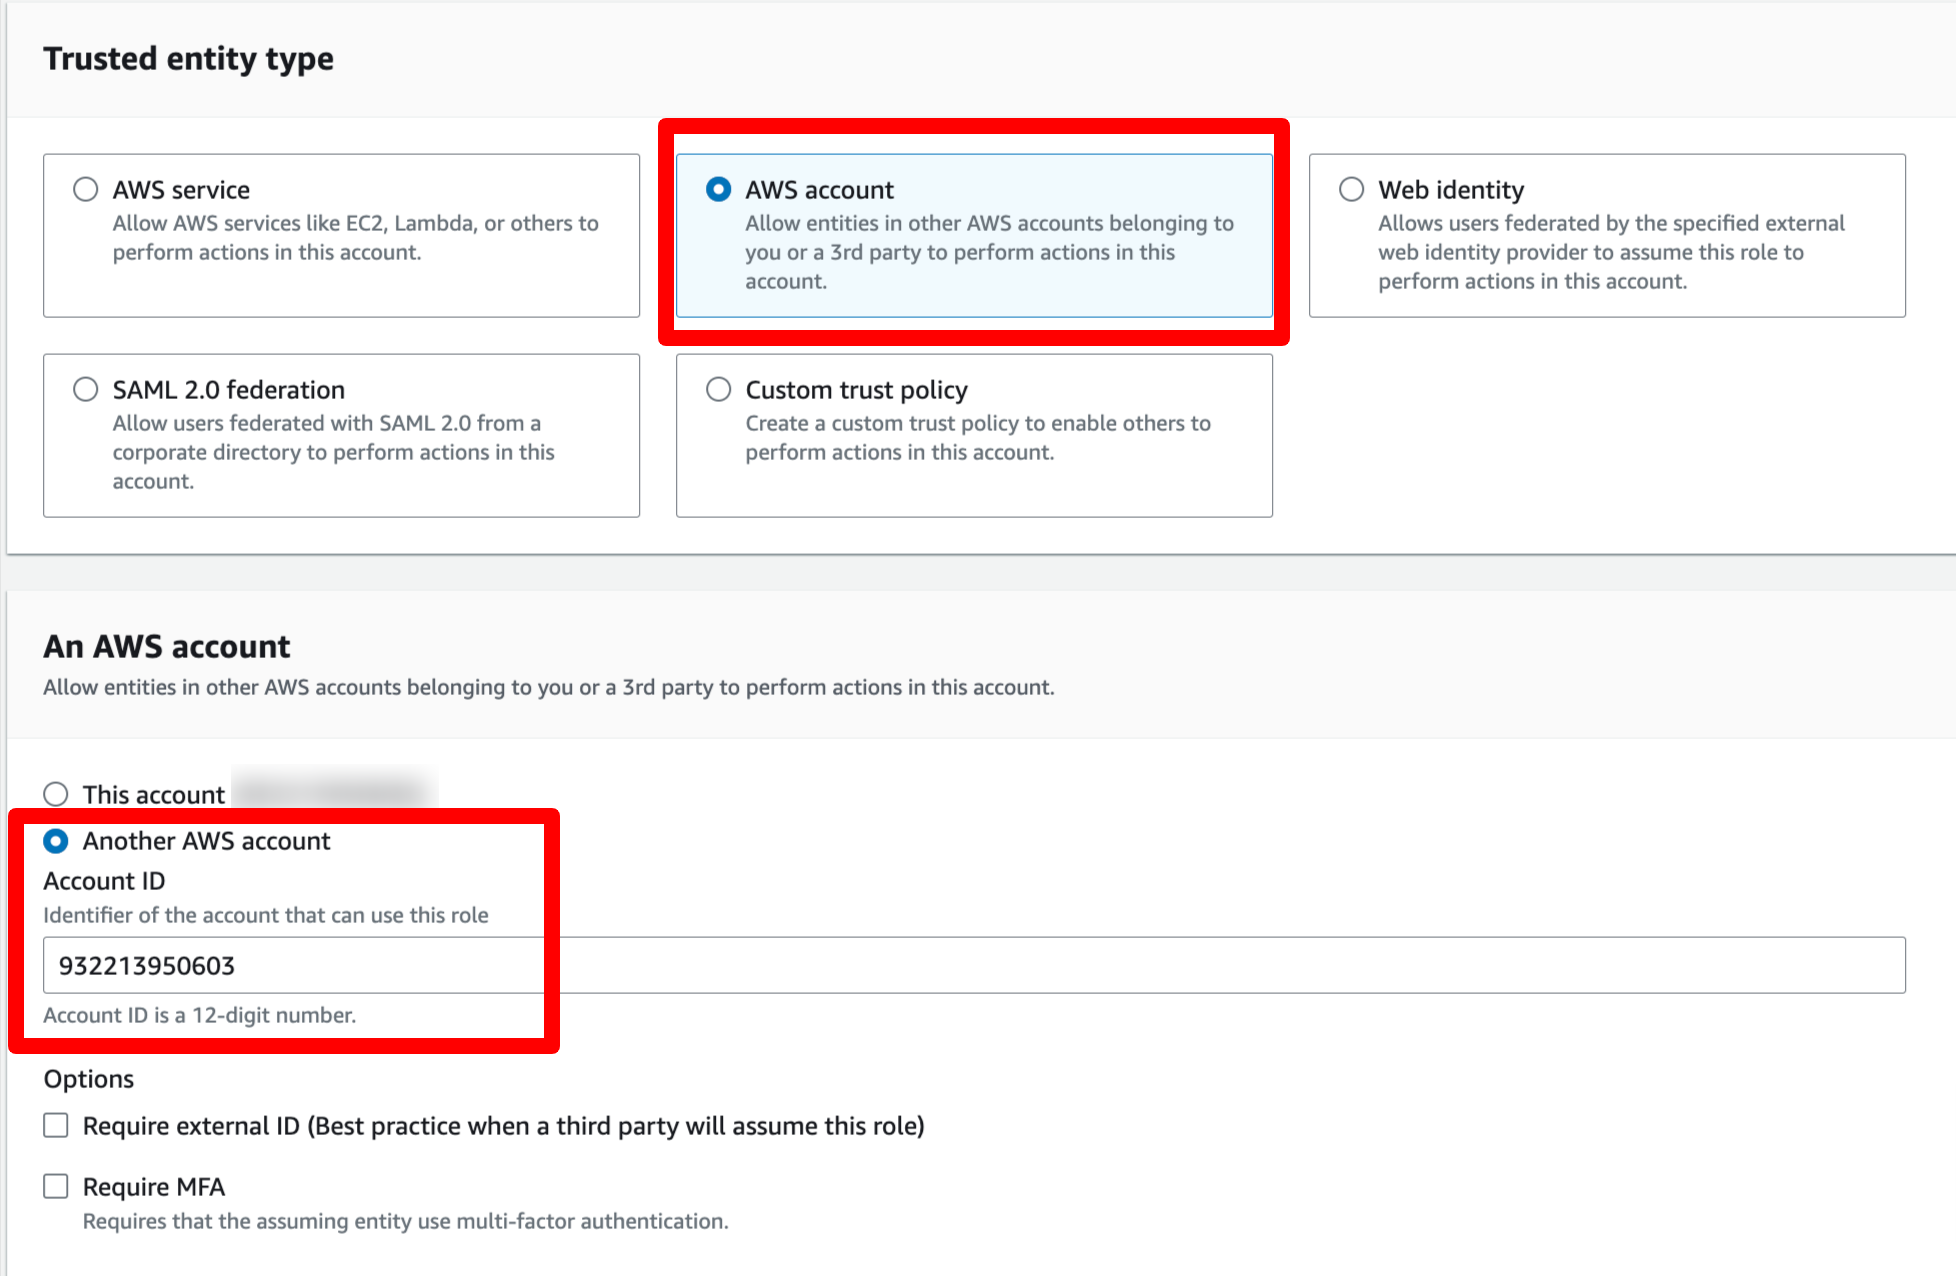
- In the search bar, select PileusPolicy (created in the previous step), and click Next.
- Set the policy name to PileusRole.
- In the Trust policy section, click Edit and paste the text from the file PileusRole.json you downloaded, then click Create role.
- Navigate to the AWS Roles page, search for PileusRole, and click on it.
- Copy the ARN value from the top of the page, and paste it into Umbrella.

Create Event Notification
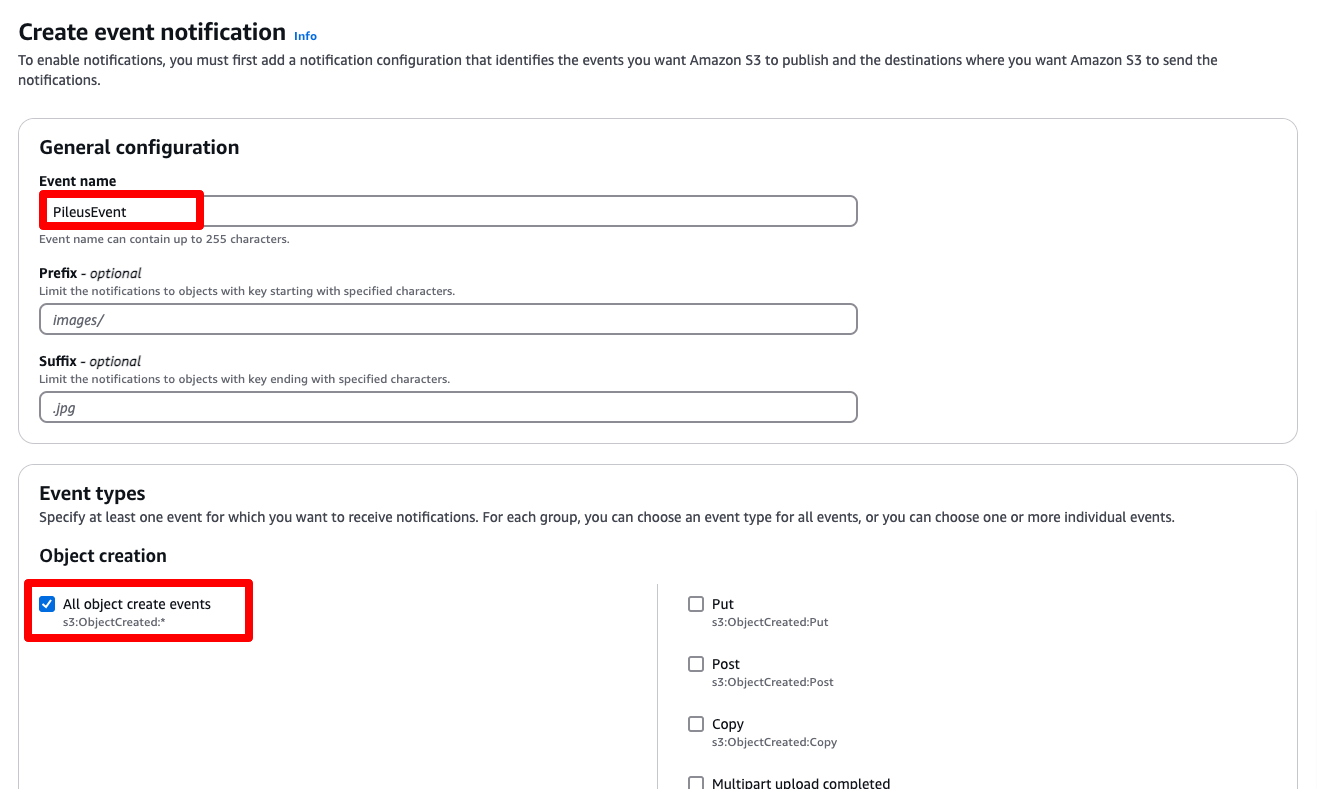
- In AWS, navigate to the dedicated S3 bucket you created and click Properties.

- Scroll down and click Create Events Notifications.
- Enter an Event name and ensure the All object create events checkbox is selected.
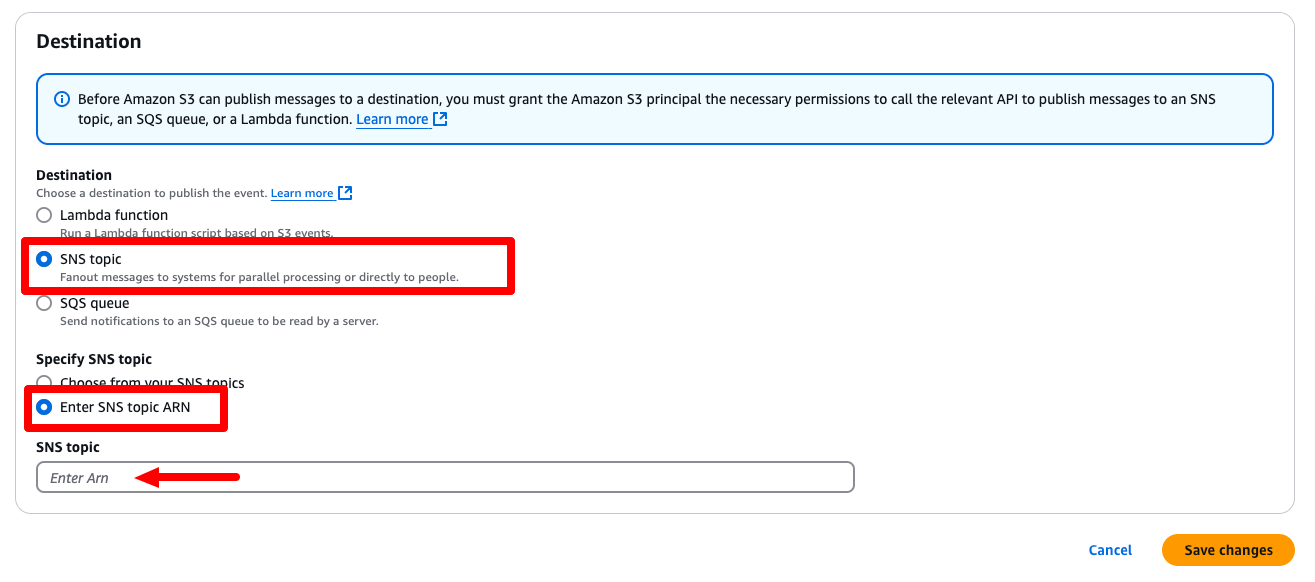
- In the Destination section, select the SNS Topic option and Enter SNS topic ARN.
Then, under the SNS topic paste the TopicArn value from the NewInvoiceTopicConfiguration.json file that you downloaded from Umbrella at the beginning of this step. Then, click Save Changes.
4. Validate Access
General Details Validations
- Bucket Name
- AWS Account ID
- Bucket Region
Permissions Validation:
Download the file from step A and paste it into the dedicated bucket you created from Umbrella. Then click Next.
This will provide access for Umbrella to download the files from this bucket.

Validating AccountIn this step, Umbrella validates all your AWS details. This step can take up to 1 hour.
We will inform you once the validation is done so that you will be able to connect your linked account.
Note: In case you do not want to connect your linked accounts you can ignore the email and we will notify you again after the entire process is done and you can see data in your account.
5. (Optional) Linked Account Status
For Umbrella to be able to create recommendations for your account, you will need to connect all the linked accounts to the platform. You can find the full instructions here.
6. Process Data
This step can take up to 48 hours (depending on when we will receive your files from AWS).
We will notify you by email once it is complete and you can see data in your account.