This article describes how to get started with a Billing Transfer onboarding of Bill-Transfer Account.
✅
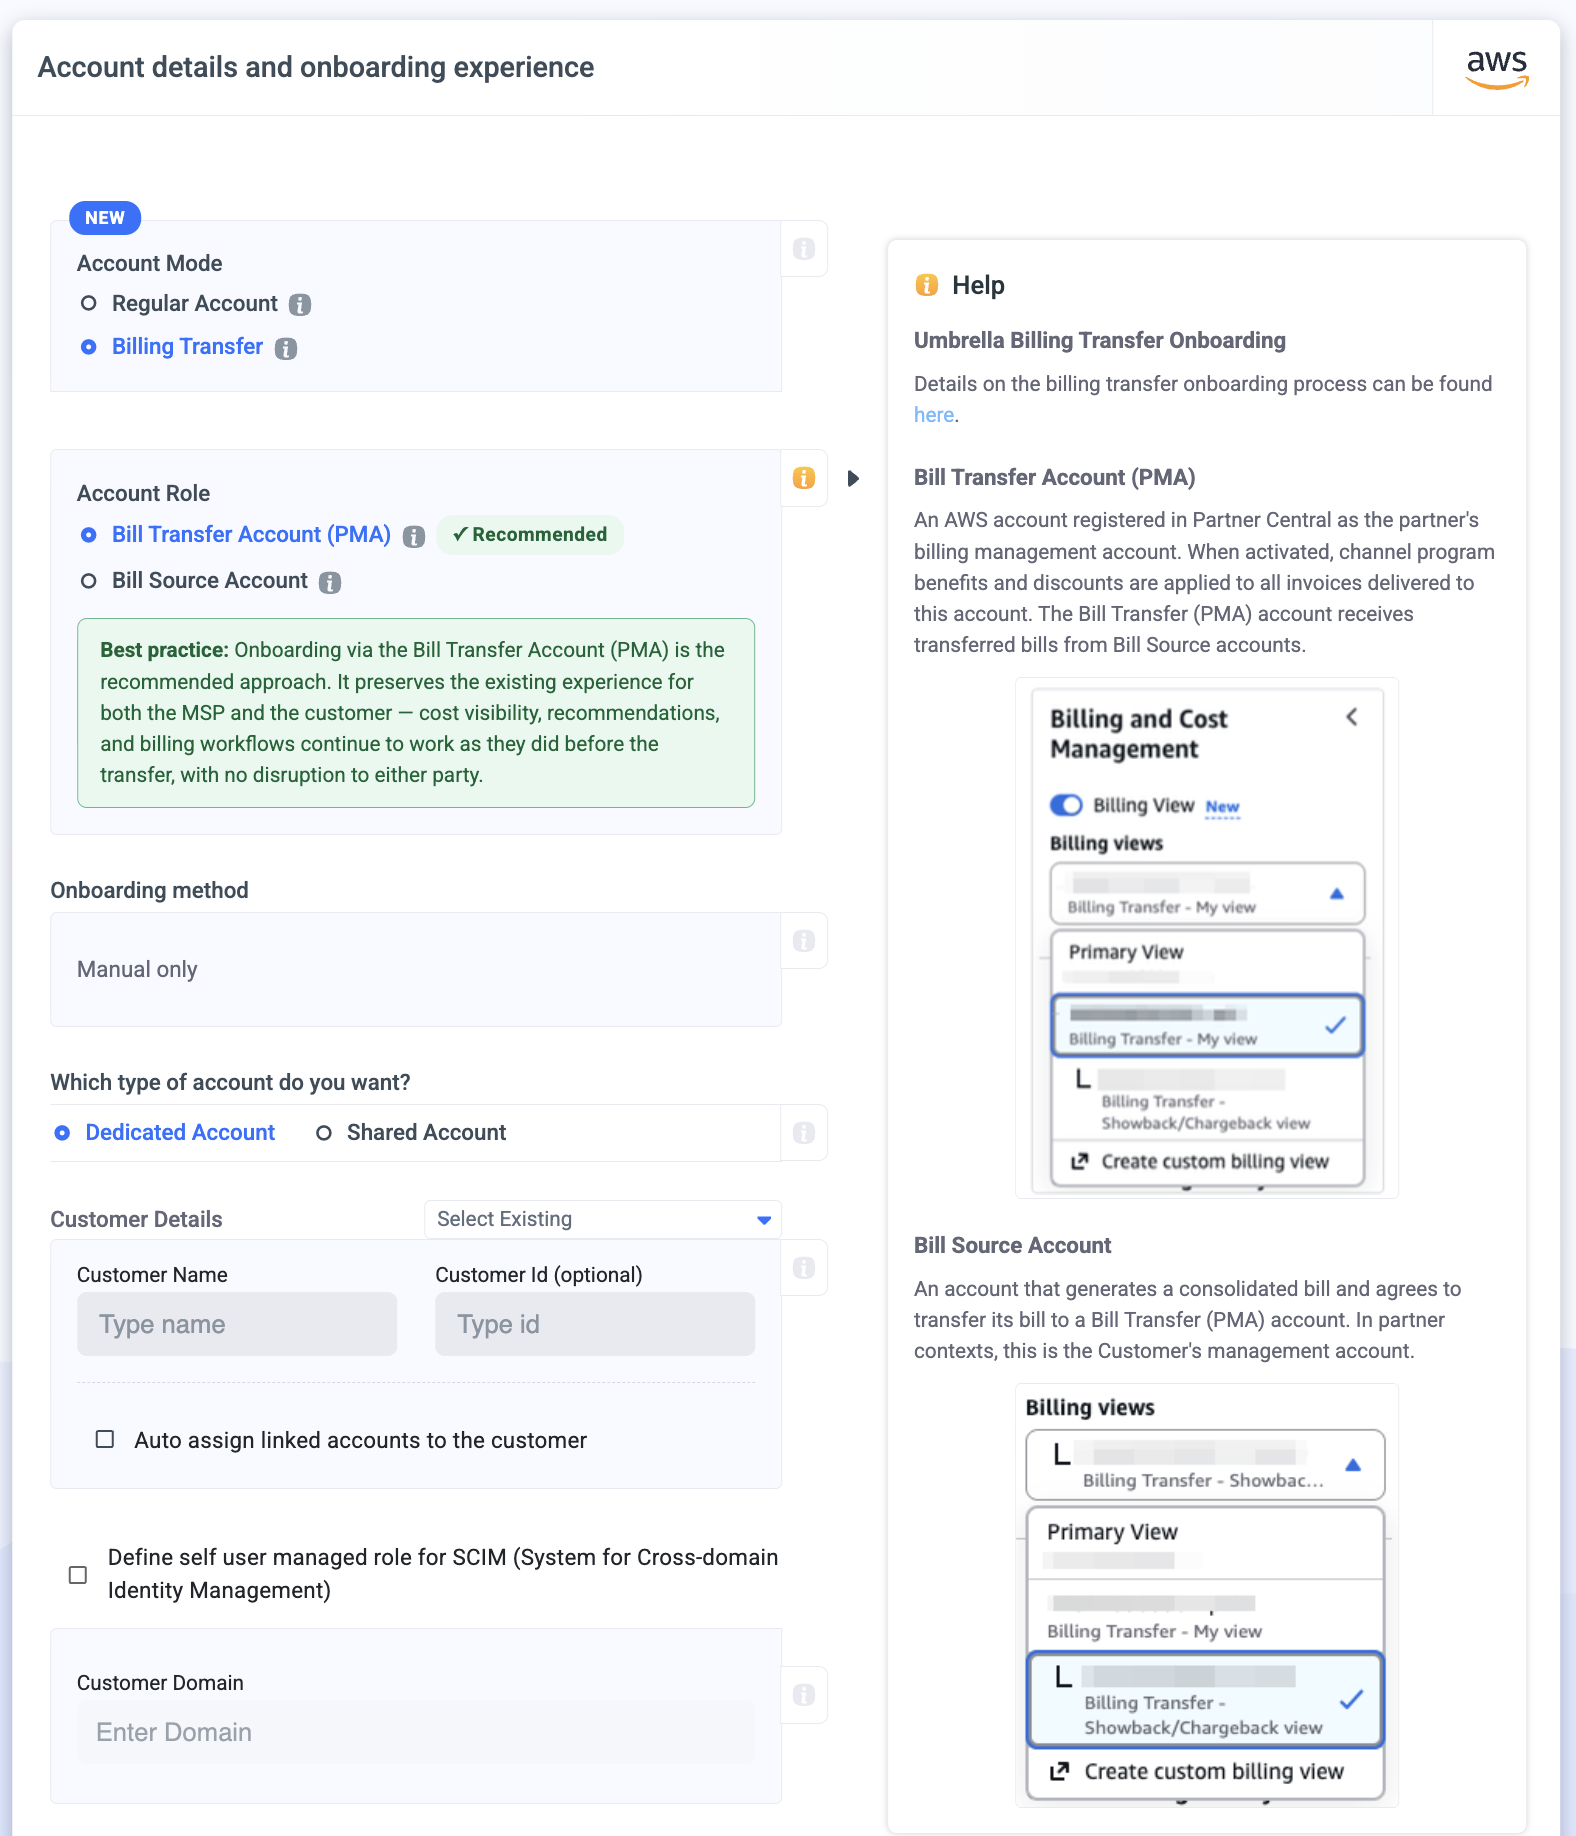
The Recommended Billing Transfer Onboarding Option.
📘
Bill-Transfer Account
An AWS account registered in Partner Central as the partner's billing management account. When activated, channel program benefits and discounts are applied to all invoices delivered to this account. The Bill Transfer (PMA) account receives transferred bills from Bill Source accounts.
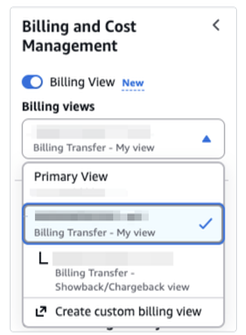
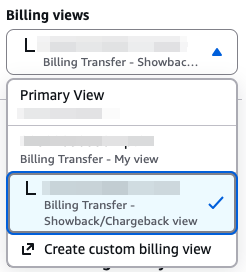
Billing View-My View
📍
Before starting the process, ensure that:
You have AWS organization permissions to create IAM roles.
The account you want to onboard is a payer account (not a linked account)
❗️
Attention, once the billing transfer invitation is approved:
Effective Date-The billing transfer for this account will take effect starting from the next billing month.
Historical Data Unavailability- Historical data for this account will no longer be accessible under the new billing transfer or source accounts.
Manual Onboarding Process Flow
Step 0: Onboarding Mode Configuration
From the Accounts dropdown list, click Add account.
Click the AWS icon.
In the Account Mode choose the Billing Transfer.
In the 'Account Role' choose Billing Transfer Account (PMA)
Currently, only manual onboarding is supported for bill-transfer account onboarding.
1: Generate CUR & generate Tags - Under 'My View'
✳️
Most of the CUR generation steps are identical to the standard manual AWS onboarding process.The only difference for billing transfer accounts is the Billing View selection.
Before creating the export, you must select the appropriate billing transfer view from the dropdown in the left navigation. All other settings, such as the export type, S3 bucket configuration, path prefix, time granularity, Tags and compression, remain the same as in a regular onboarding.
❗️
Each Billing View maintains its own separate set of exports. The partner my view export and the showback/chargeback view export are completely independent, they write to their own S3 paths and contain different cost data.
You must switch the active Billing View in the left navigation before creating each export, as the Data Exports page always reflects the currently selected view.
In AWS, CUR exports are tied to Billing Views. Each Billing View represents a specific perspective of cost data, and when you create a data export, it exports the data corresponding to the currently selected view.
This means that for billing transfer accounts, different views produce different CUR data.
The "Billing Transfer - My view" exports the actual billing data the Bill Transfer (PMA) account is financially responsible for at actual AWS rates.
The "Billing Transfer - Showback/Chargeback view" exports the billing data configured through Billing Conductor, reflecting partner-configured rates, markups, and custom pricing. The "Primary View" exports the Bill Transfer account's own organization cost data, separate from any billing transfer views.
Generation Flow
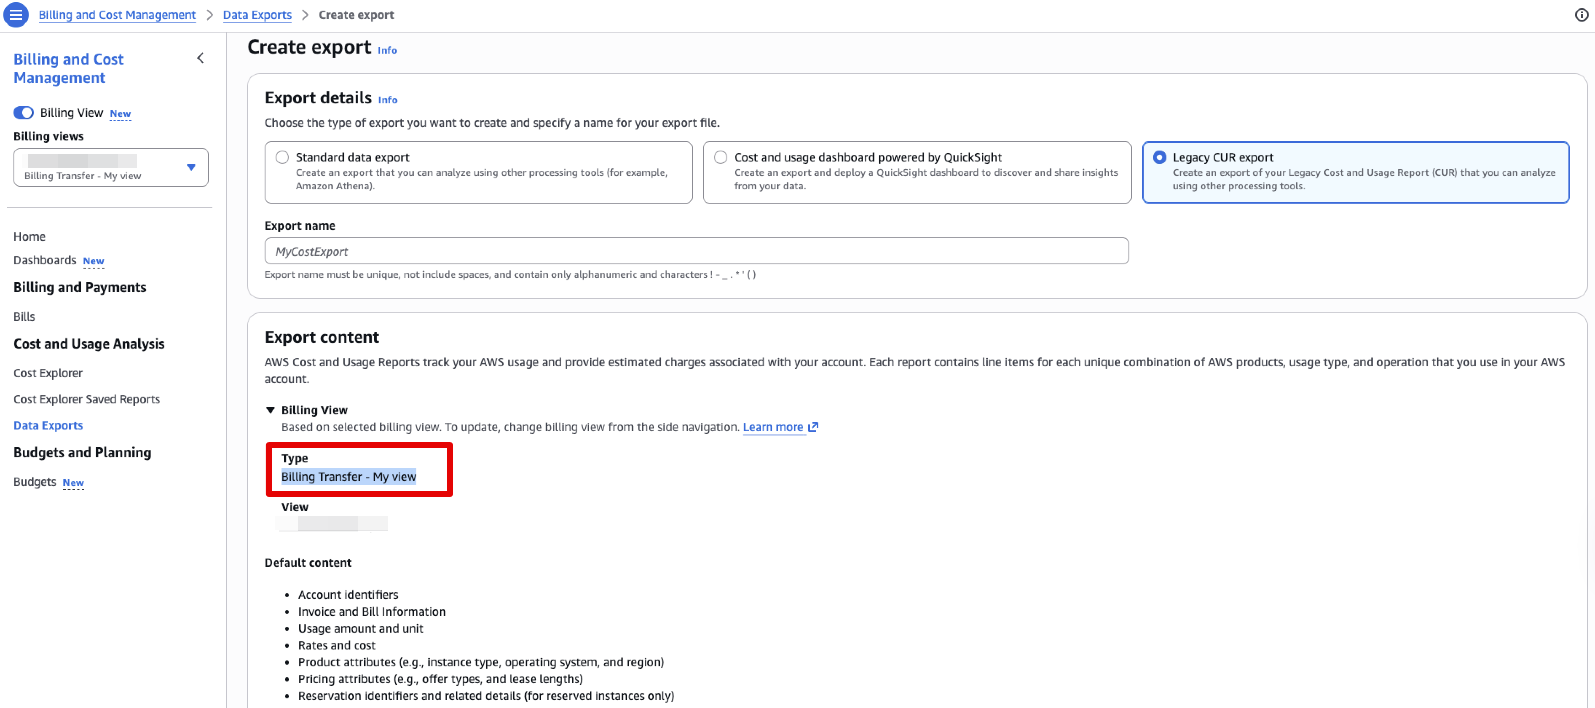
To create the CUR export, sign in to the AWS Billing and Cost Management console on the Bill Transfer (PMA) account. In the left navigation, make sure the Billing View toggle is enabled (it may be marked as "New").
Then select the appropriate view from the Billing Views dropdown. For Umbrella onboarding, this should be "Billing Transfer - My view" to export the partner's actual cost data.
Once the correct view is selected, navigate to Cost and Usage Analysis and then Data Exports in the left sidebar.
Click Create export and choose "Legacy CUR export" as the export type.
Enter an export name , which must be unique, cannot include spaces, and may only contain alphanumeric characters along with ! - _ . * ' ( ).
Under Export content, verify that the Billing View section displays the correct view type, for example "Billing Transfer - My view".
📘
We recommend using UmbrellaCostCUR
Bill Transfer Account- My view CUR Export
Define the following in the export details:
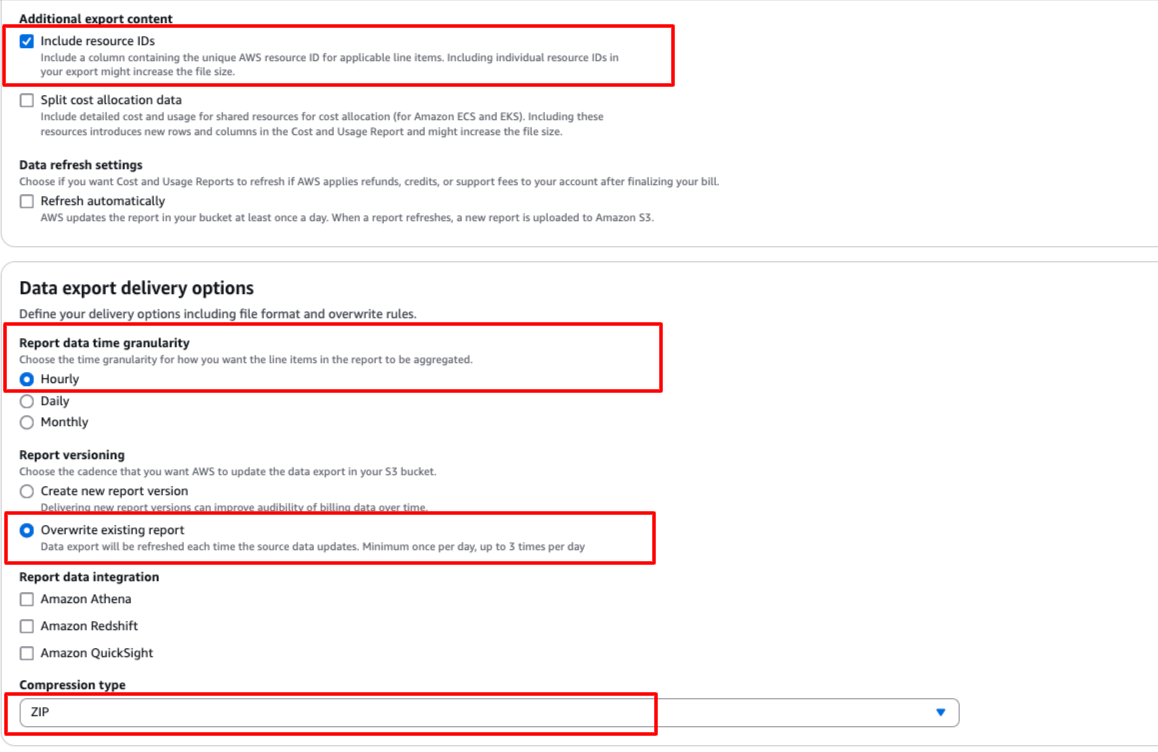
Under the Additional export content choose Include resource IDs.
Choose hourly time granularity.
Under Report versioning choose the Overwrite existing report option.
Make sure that the Compression type is ZIP.
Under Data export storage settings choose the option to configure S3 bucket.
Click on create a new bucket and name it as you like (we recommend UmbrellaCostCUR).
Note the region and click Create Bucket.
ℹ️
Note the region of the bucket as you will have to enter it in the Umbrella Cost platform.
The bucket should be dedicated to Umbrella's CUR files (not contain any other CUR files), which means bucket per customer (for MSPs).
In the S3 path prefix enter the value: Umbrella.
Click on Create Report.
In order to see the Tag values in the CUR follow the below steps:
From the left menu click on Cost allocation tags.
Select all the tags and click Activate.
2: AWS Details - Add Details from AWS for Your CUR
This step adapts based on the account role selected in Step 0.
🔹 Bill Transfer Account (PMA)
Account IDs 🆕
Both account IDs are required:
Field
Tag
Description
Bill Transfer Account (PMA) ID
BILL TRANSFER
The PMA's AWS account ID
Bill Source Account ID
BILL SOURCE
The customer's AWS account ID
Standard Fields
Field
Description
Display Account Name
Display name in Anodot/Umbrella
Bucket Region
AWS region of the invoice bucket (e.g., us-east-1)
Invoice Bucket Name 🆕
The label reads "Invoice Bucket Name (Bill Transfer/PMA Account S3)" to clarify this is the bucket on the PMA.
⚠️
Unique per Bill Source
Each Bill Source account under the same Bill Transfer (PMA) account must use a different invoice bucket. Onboarding will fail if the bucket is already in use by another Bill Source on this PMA.
A helper text reads: "Enter the S3 invoice bucket from the Bill Transfer (PMA) account - unique per Bill Source."
Processing Currency (Optional)
A checkbox to set a processing currency for the account with a currency dropdown.
🔹 Bill Source / Regular
The original layout is preserved with no changes:
Field
Description
AWS Root Account ID (Bill Source Account)
The customer's AWS account ID
Invoice Bucket Name
Standard S3 bucket for CUR data
Display Account Name
Display name in Umbrella
Bucket Region
AWS region of the invoice bucket
No dual account IDs, no dual roles, no bucket uniqueness warning.
3: Grant Access - Grant Umbrella Access to Your AWS Root Account
This step also adapts based on the account role.
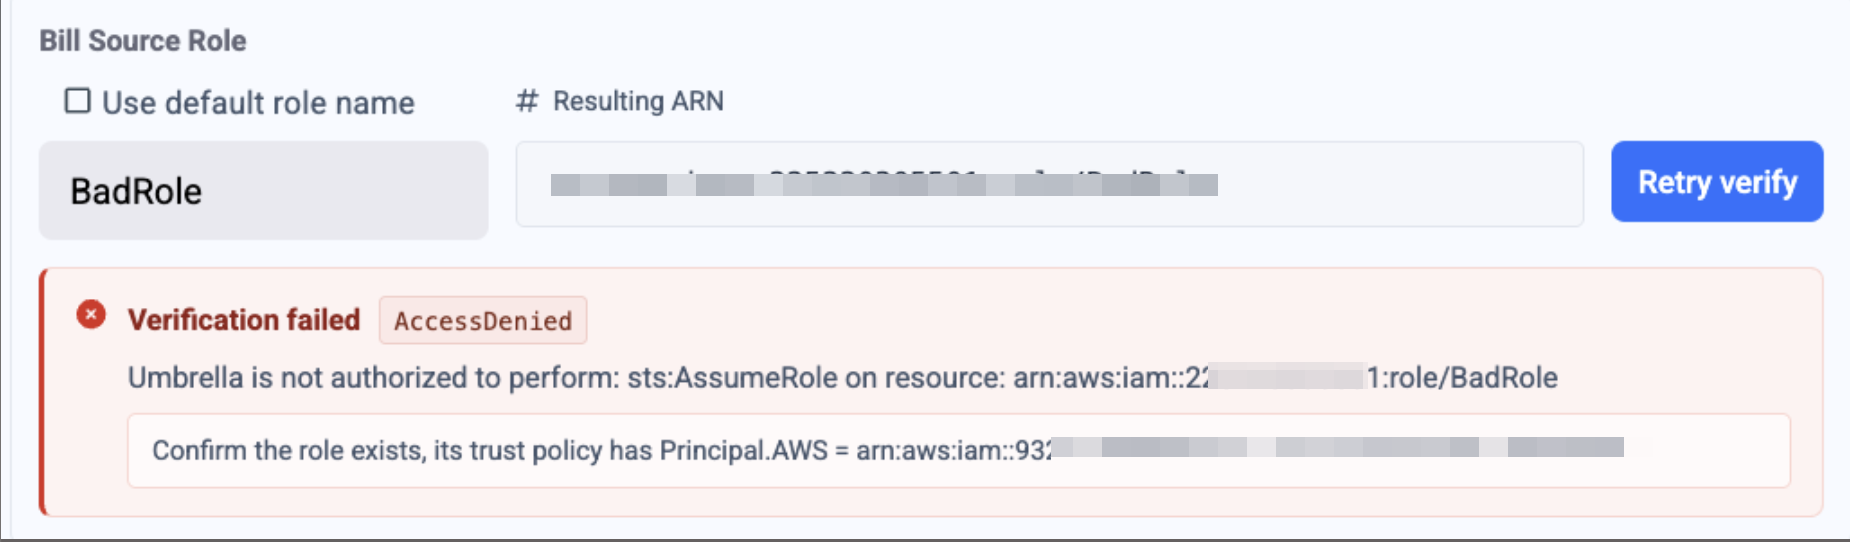
Verify your roles: validate if thePileusRole does not exist or is named differently in the customer’s account.
Verification failure scenario:
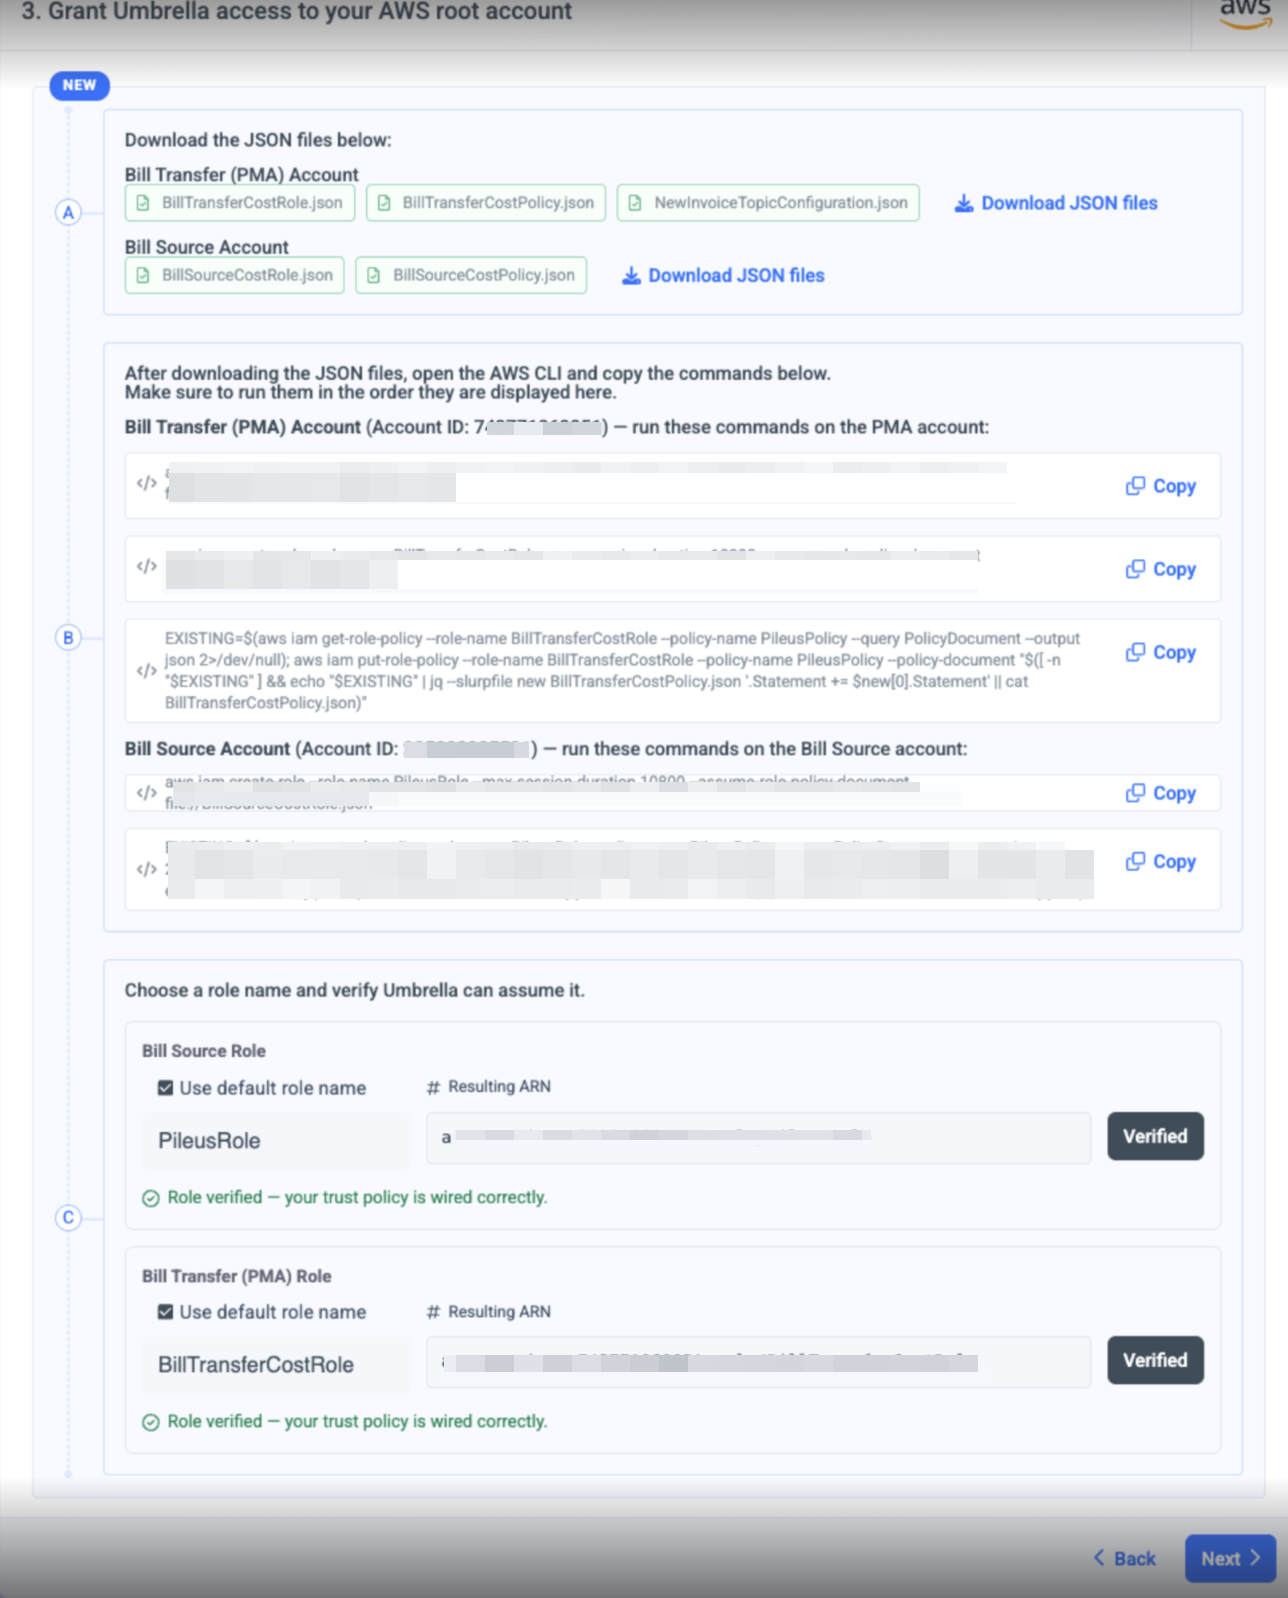
🔹 Bill Transfer Account (PMA)
A - Download JSON Files
Two sets of JSON files, grouped by account:
Bill Transfer (PMA) Account:
BillTransferCostRole.json
BillTransferCostPolicy.json
NewInvoiceTopicConfiguration.json
Bill Source Account:
BillSourceCostRole.json
BillSourceCostPolicy.json
B - Run CLI Commands
Commands are split by account and displayed with the account ID for clarity.
Bill Transfer (PMA) Account (Account ID shown) - 3 commands:
ARN output from the Bill Source role creation command
🔹 Bill Source / Regular
The original layout is preserved:
A - Download JSON Files
Three files: New Invoice Topic.JSON, Anodot Cost Role.JSON, Anodot Cost Policy.JSON
B - Run CLI Commands
Three commands run in order on the root account.
C - Enter Role ARN
Single Role ARN input.
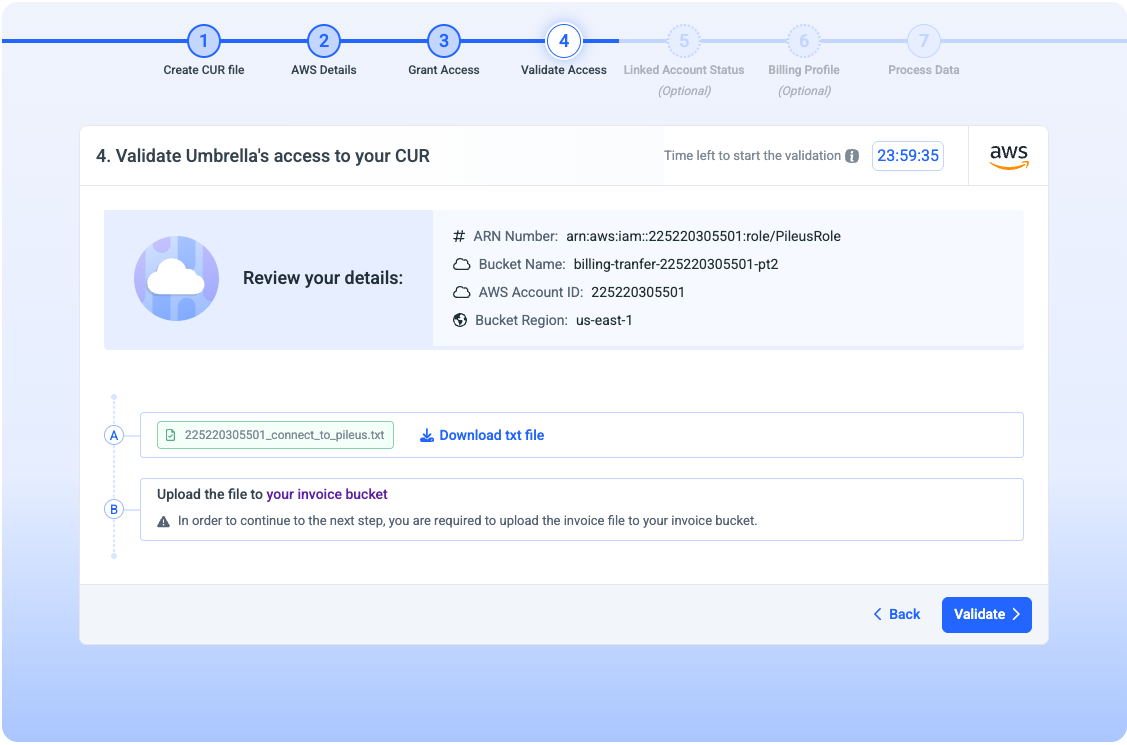
4: Validate Access - Validate Umbrella's Access to Your CUR
General Details Validations
Bucket Name
AWS Account ID
Bucket Region
ℹ️
Note
Role ARNs are not shown in the review section as they were created and entered in Step 3.
Transfer Billing Validations 🆕
Two additional validations run for billing transfer accounts:
Validation
Status
Description
Bucket uniqueness on Bill Transfer (PMA) account
✅
Verified that this bucket is not used by other Bill Source accounts on the same PMA
Bill Transfer (PMA) role assume check
✅
Confirmed that the role can be assumed on the Bill Transfer (PMA) account
PMA-Side Steps
⚠️
Action Required on PMA
The following steps must be performed on the Bill Transfer Account (PMA) side. Make sure you have access to the PMA's AWS console or CLI to complete the download and upload steps below.
A - Download JSON File
Download the Connect to Anodot.JSON file.
B - Upload to Invoice Bucket
Upload the file to the invoice bucket on the Bill Transfer Account (PMA).
⚠️
You must upload the invoice file to the PMA's invoice bucket to proceed to the next step.
5. (Optional) Linked Account Status
🔔
For Umbrella to be able to create recommendations for your account, you will need to connect all the linked accounts to the platform. You can find the full instructions here.
6. Process Data
This step can take up to 48 hours (depending on when we will receive your files from AWS). We will notify you by email once it is complete and you can see data in your account.